A New Way to Taste Coffee: The Video

Yep! That’s it. It may seem a bit strange but a few months back I stumbled across this methodology. I was rushing out for work after my daily cappuccino and as I ran after the bus, I puffed up in exhaustion and I noticed, wow – that was a nice smell – it was like hot chocolate with caramel with some hints of black berries – so I puffed up again to delight my nose with those lovely aromas again – I love good smells. When I got home, I actually checked the taste profile on the coffee bag and none of the smells that I picked up as a I huffed and puffed earlier resembled the roasters profile. So, I thought, have I stumbled onto something new ? For this post, I used an espresso blend coffee from my fave Viennese cafe, Balthasar and brewed another cappuccino – the culprit below (taste profile was milk chocolate and red berries)

I must confess this time I picked up similar smells resembling the taste profile but with caramel on top too.

Actually, I’m not that full of myself (another English colloquial term for arrogant) to think this is new, because I’m sure that some other coffee connoisseurs have picked up on this before.

Strictly speaking it may not be another way to “taste” coffee, but rather another way to appreciate coffee through your nose, as after all, your nose is part of the tasting process before you actually taste the coffee with your mouth. It could also be another breakfast (if you cannot handle coffee at night) trick to impress your friends with like “I’m picking up some other taste profiles when I taste this coffee” and then you puff up through your nose and share what smells and aromas you’re picking up.

I encourage you to try out this method with other types of coffee like espresso and pour-over and delight your nose. Sniff and puff up away and enjoy.

Advertisement

I’m Trying out a new Aeropress Recipe

I’m the type of person that needs change and ever so often I’m looking for new ways to experience things with food and drink. Sometimes I think that my taste buds are so used to good coffee that I wonder what I’m tasting and if all coffee doesn’t taste the same. Well! that misconception is usually short lived until I go to a “typical” coffee shop or spot and they offer me coffee and I think “how can they get this so wrong”. I’m still intrigued by the on-going debate about how world class restaurants serve you fantastic food but when you ask for that espresso at the end of a great meal, you think “why did you get this wrong?”.

Ok, I digress. I was looking through the flipboard (apple app for news update), which naturally I subscribe to coffee news and came upon this recipe on thecoffeecompass by Michael Butterworth, who is a coffee educator, who cofounded the Coffee Compass and is a two-time USBC Competitor, licensed Q Grader, and was once the 4th best Aeropresser in America (source: the coffee compass). Since finding the recipe I’ve tried it thrice – once verbatim, second, when I didn’t break the crust but took it out to give a cleaner cup and today with a slight adjustment on temperature and steep time.

In summary, it is;

15g freshly ground coffee

225ml of 95C hot water

Using two filter papers

Pour almost boiling water into the aeropress and place plunger on – this will create a vacuum

Steep for one minute

Take plunger off and break crust but giving it a quick stir

cover again and steep/leave for about 4 minutes, then plunge.

For my slight variation today; I used 15g of coffee but about 240ml of 91C hot water. Followed the same plunge and break the crust, but for the final steep, I left for about 2 minutes.

What did I notice taste wise using Kenya AA Plus Gicherori, SL28-SL34 Ruiru 11 ? For Michael’s version, definitely more fruity. I was excited by this new recipe and fruitiness and medium acidity tickling my tongue.

For my second variation (removal of crust for a cleaner cup) – medium acidity with a light citrus taste. For my third variation (lower temperature and reduced brew time) – whilst not as fruity as version one, but more balanced.

What did I learn also ? Using 95C hot water and pouring in straight away creates a vacuum – I actually thought that coffee would start dripping straight away but it didn’t. I was also fascinated by the breaking of the crust concept. I tried this coffee on the Hario V60, but it wasn’t as fruity as on the aeropress.

I’m quite excited by this new version and I’ll probably use it until I am intrigued by another simple to use recipe. Please share any aeropress recipes with me and perhaps I’ll feature them too.

Enjoy!

Redefining the Barista: Back to the Future


I remember when I started getting really into espresso coffee and reading all the stuff about the importance of making good espresso as captured in the importance of the espresso blend, the espresso machine, the grinder and finally…. the BARISTA. Even if you got everything right and the barista failed to tamp with the right amount of pressure, prep the machine and maintain it during and after the day, the espresso would still come out bad. I still get people saying to me, “oh! don’t worry, we are using a really good coffee” and worringly they may add “I’m not really good at making coffee but the coffee is good” – like the most important thing is the coffee – it’s a lot more than that.


So, when I started visiting really good coffee shops way back when – over 10 years ago, I was not just excited to be ordering coffee, but I would always be excited to chat to the barista and ask them about their day, the coffee, what temperature they were brewing at, etc. The barista was the star of the coffee shop – the leading actor – everything started and ended with him/her serving you a great cup of coffee. Okay, I confess, these things still get me excited and may be I even go further like “if it’s fruity, can you increase the brew temperature so that it isn’t too bright” and “which coffee is best for milk, espresso or filter brew” which leads to me to the main reason why I’m writing this piece.


I found out lately that most baristi (plural for barista) I quiz tend to give me a slightly puzzled look. I’ve noticed too that even though the game has been upped in espresso, most people still go to a really good cafe and just order a latte and pour sugar into it. Great! good coffee is in vogue but I’m not so sure if the onus on taste has been successfully transferred to the masses.

Am I loosing you?

The barista is an expert – an expert at making good coffee and all experts should be familiar with their tool and provide a service in a professional manner.

I accept that not everyone that walks into a cafe will be like me or the others who have way more expertise than me, but I kind of expect that the barista should be able to answer some basic questions about the coffee and to advise me on what would be best.


Coffee is now big business, after all McDonalds and Dunkin Donuts wouldn’t have focused on coffee if it wasn’t and you wouldn’t have the likes of Starbucks offering flat whites (the drink of the espresso milk based connoisseur).

Just the other week Perfect Daily Grind conducted a poll on twitter about what we want to see in 2017 and I wrote…. “I’d like to see baristas more versed in coffee knowledge”.

I hope I don’t come across as a coffee snub as my wife jokingly describes me – well! I think she says it jokingly. It’s just that I want the service that I used to get when I started my coffee journey many moons ago, as usually things develop for the better. I recall a quote from Seth Godin;

“Don’t find customers for your products, find products for your customers.”

My understanding of which is that some of your customers want more and you shouldn’t shun them but attend to them to. I wouldn’t go to the extreme like some cafes who snub you if you don’t know anything about coffee, order a cappuccino in the afternoon (in some cafes in Italy, they’ll say no) and scream at you if you put sugar in your coffee. In fact one cafe, doesn’t even have sugar.

Even though I’m in my 40s (no shame), I still want to learn and thats what got me excited about coffee – there was so much to learn and I’m sure there’s still more to learn, so teach me barista…. I’m not saying each barista should be like former US barista champion, Pete Licata, who visited the coffee farms to learn which coffee to choose for the WBC, which he finally won in 2013.

The situation is further exacerbated where attention to detail in making a great espresso has been compromised in favour of a milk based drink. Again, the basis for a good cappuccino, flat white of latte is a great espresso but that has been sidelined, so much so, that I rarely order espresso out of my home, but there are exceptions


So, what next?

Back to the future or the basics – teaching the barista to focus on the essential elements coupled with great customer service based on good knowledge of the coffee they are brewing and how to adjust the brew parameters during the course of the day. When I had a coffee shop, I used too ask the barista to check the espresso machine and time the shot about 4-5 times a day. We weren’t as busy as your typical London cafe, which I presume would need checking a lot more times during the day.

I think when you look at all those lovely bags of coffee and the way they describe the coffee; caramel, blackcurrant, grapefruit acidity, lemon curd, etc the main reason we don’t taste them is the barista – harsh, but I guess it’s also down to your palate too. 


I’d like to see the time when you enter a coffee shop and those taste profiles are displayed on a coffee menu, so that you are tempted to taste something different and escape with your taste buds to another world – ah! the drink of the escapist and the non-compromiser of taste.

Coffee: The rule is, there is no rule


I know that sounds like a paradox and I’m sure some of my followers are like “what is he talking about” For many years, Lameen, that’s my real name – has been saying adhere to the golden rules – measurement, temperature and volume, to name a few. BUT, the main reason I’m writing this, is that occasionally I’ve strutted into a place to dictate how my coffee should be made, and on more than one occasion this year, I’ve been pleasantly stunned by coffee served to me without the rules I hold dear.

Don’t teach an old dog new tricks with Espresso

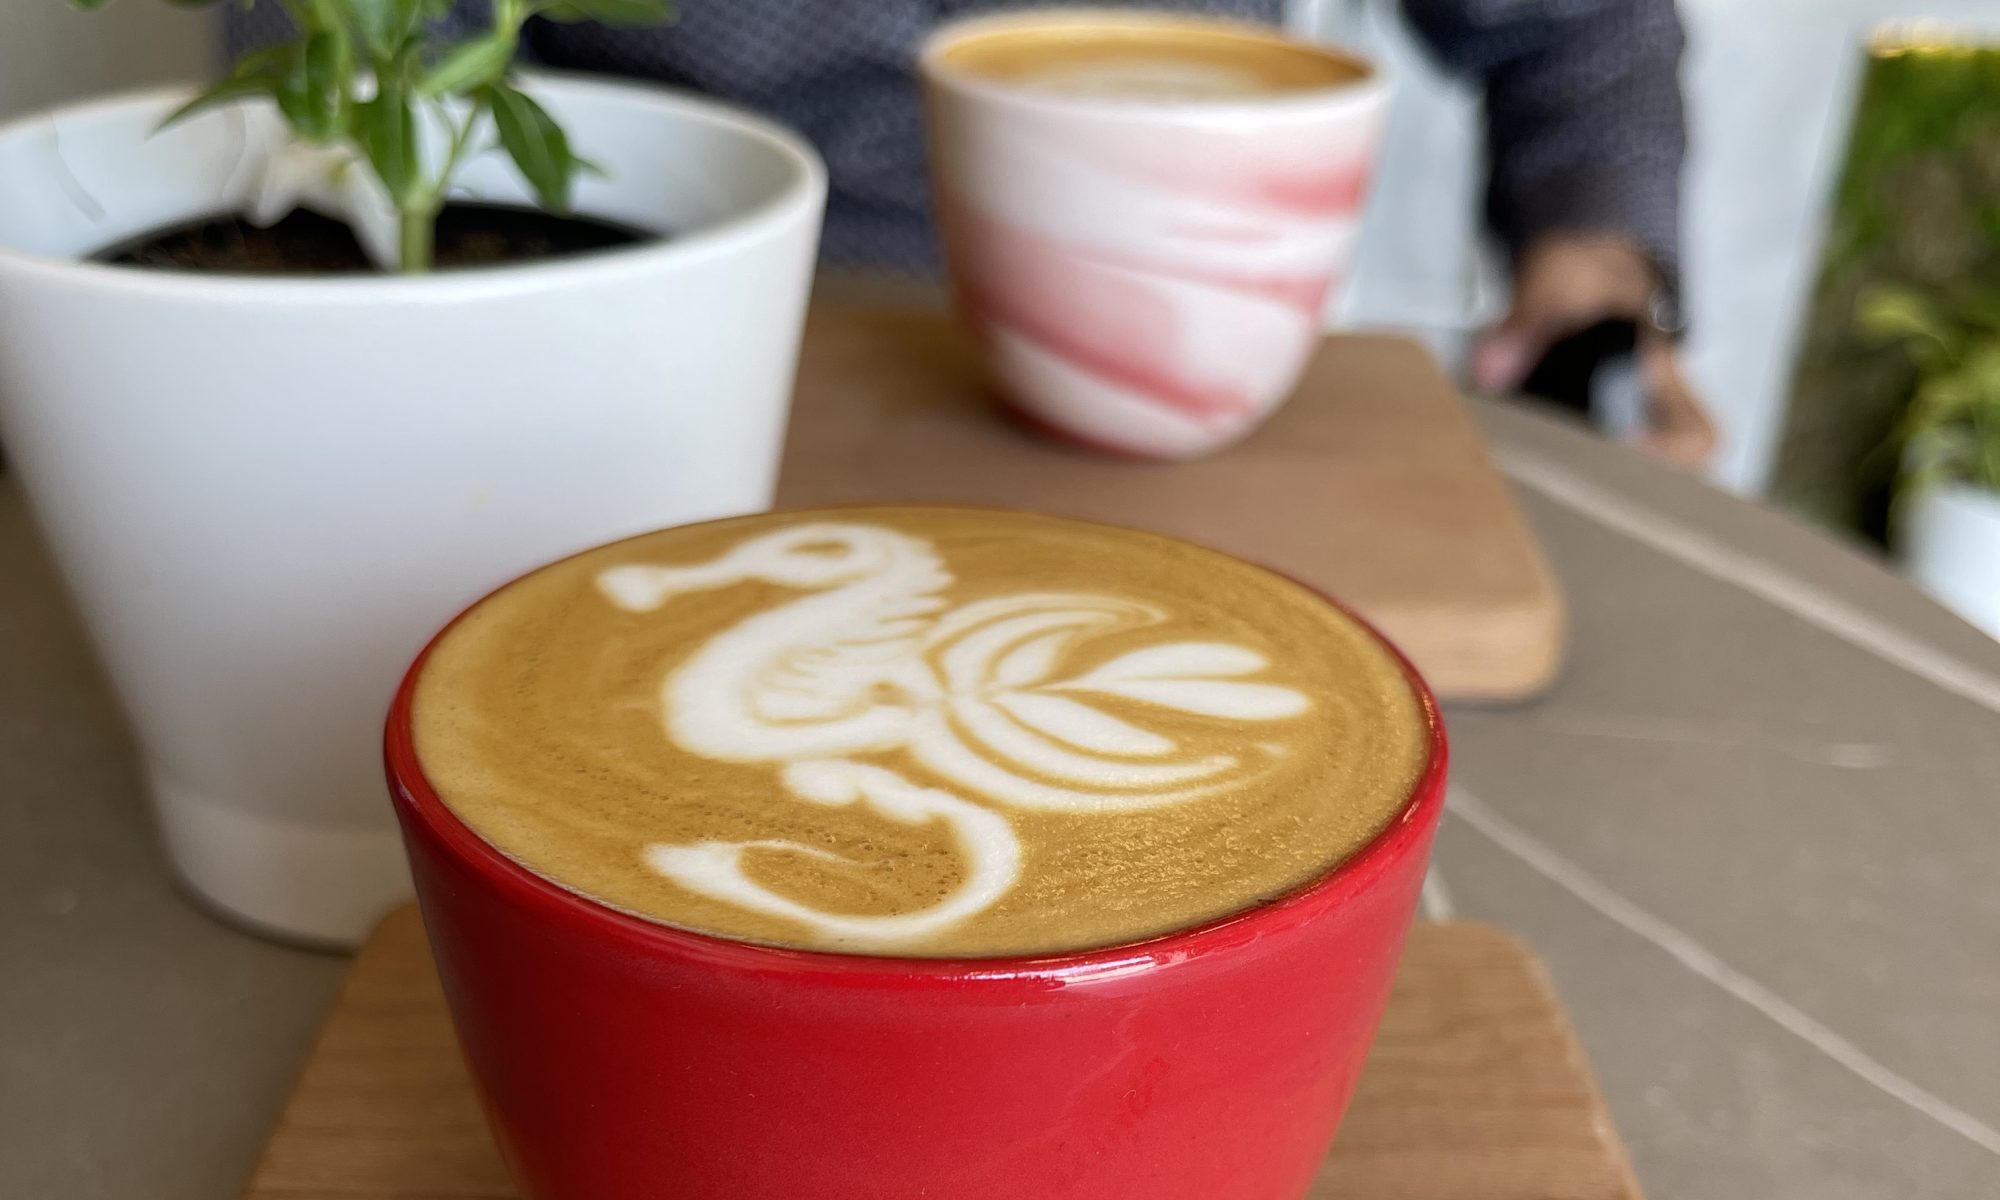
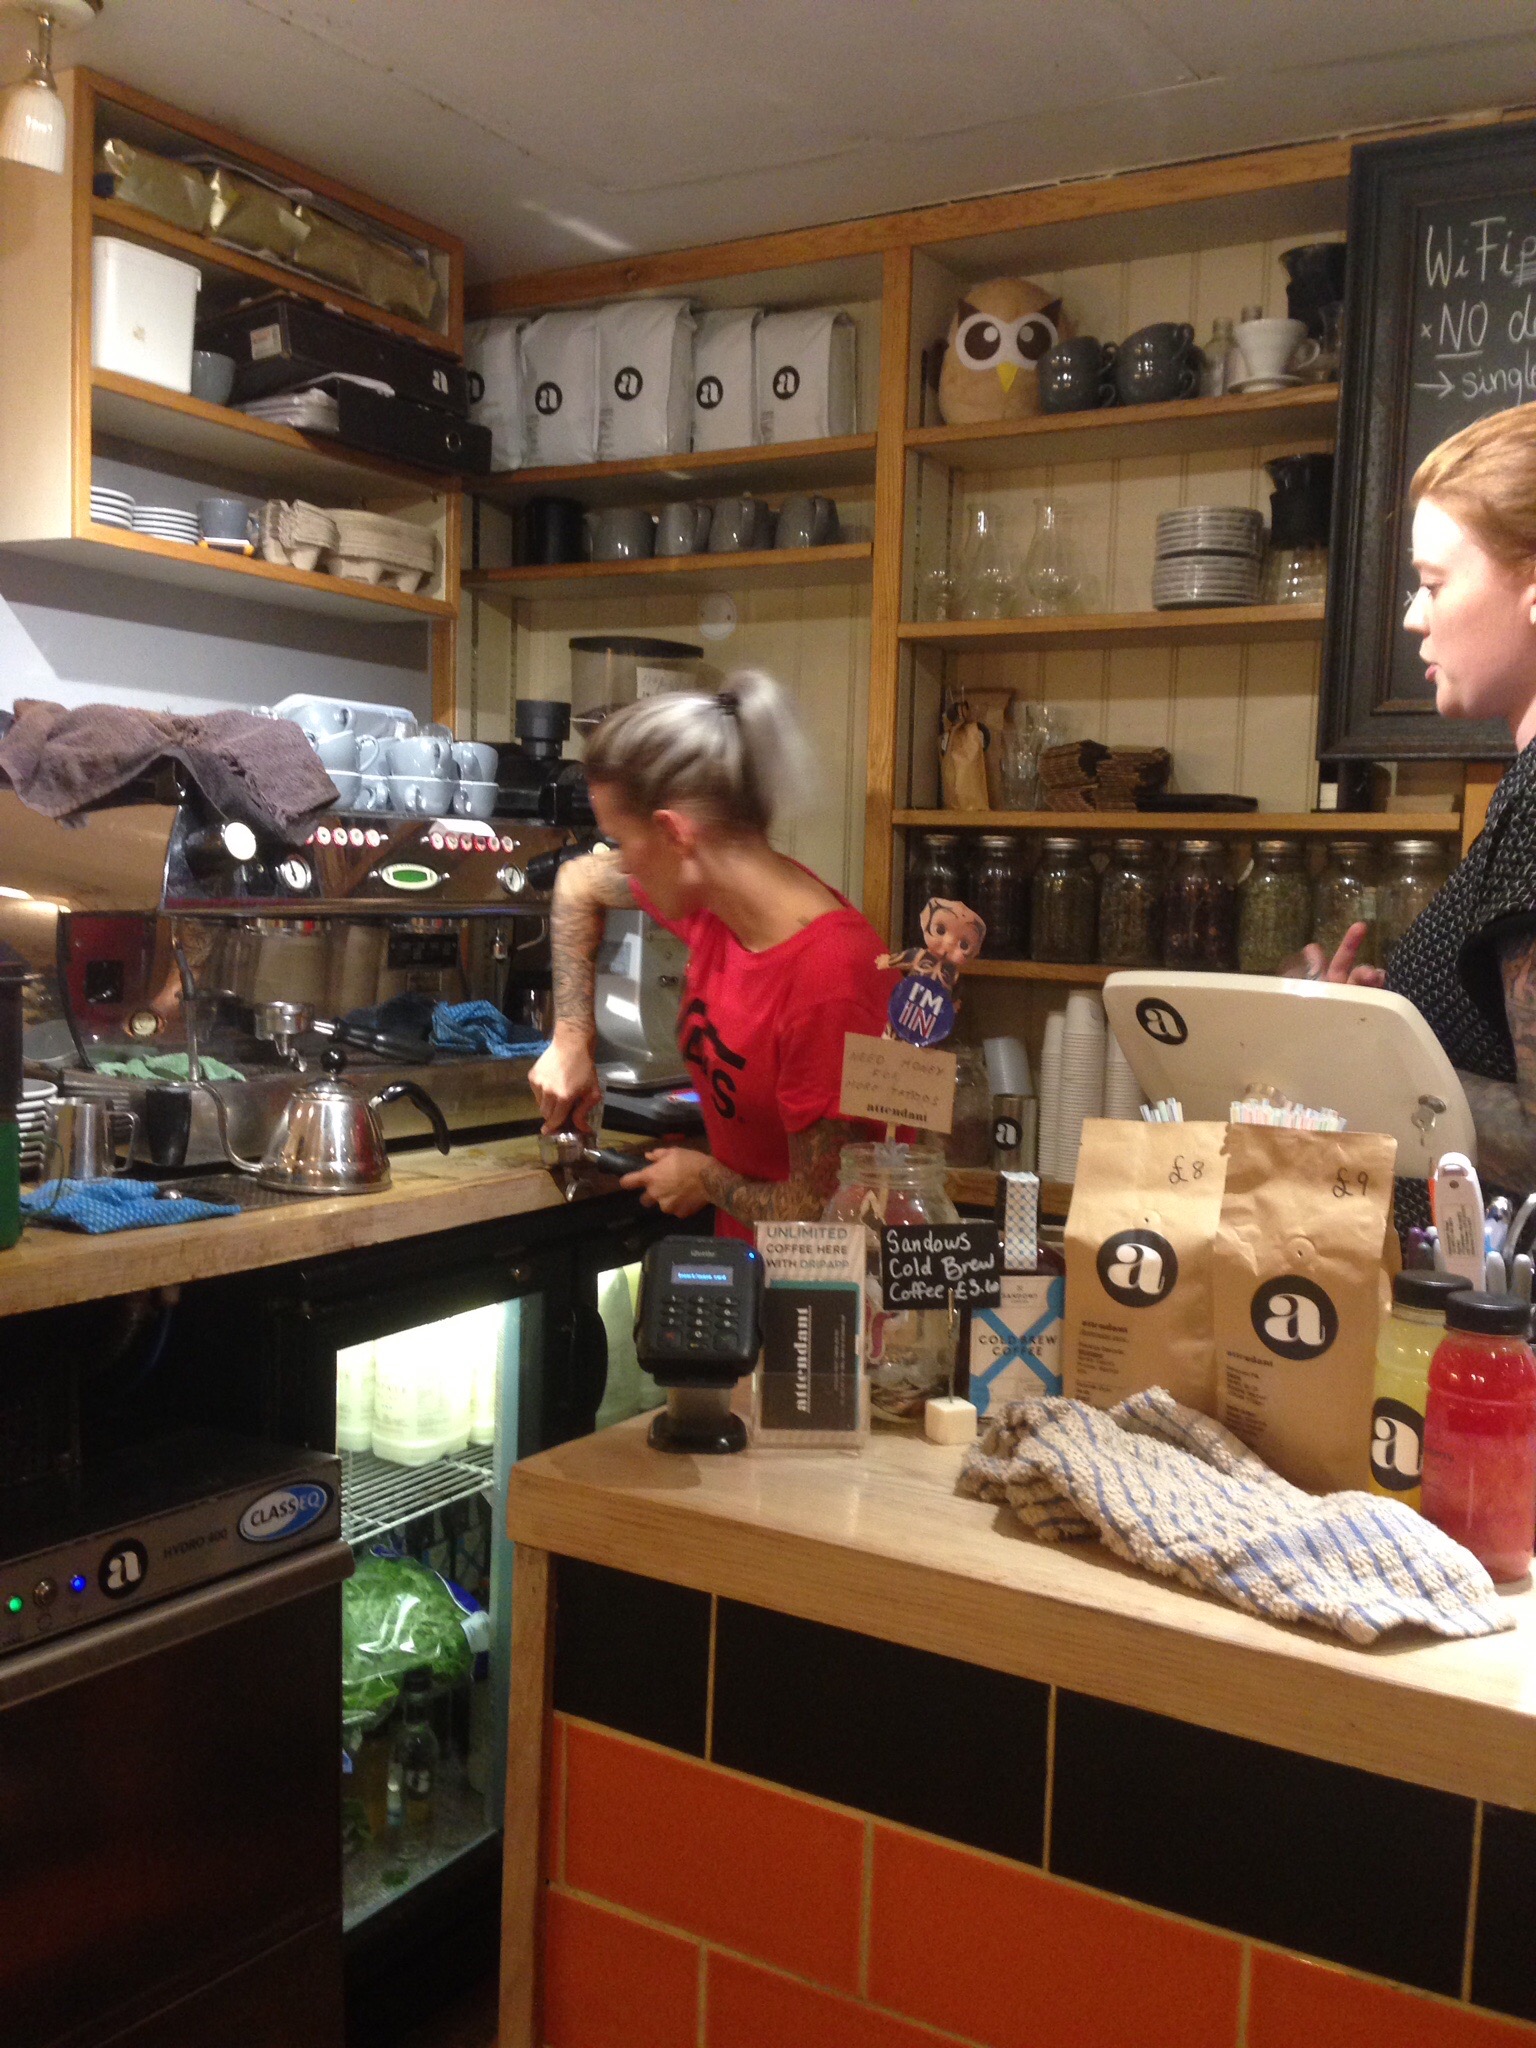
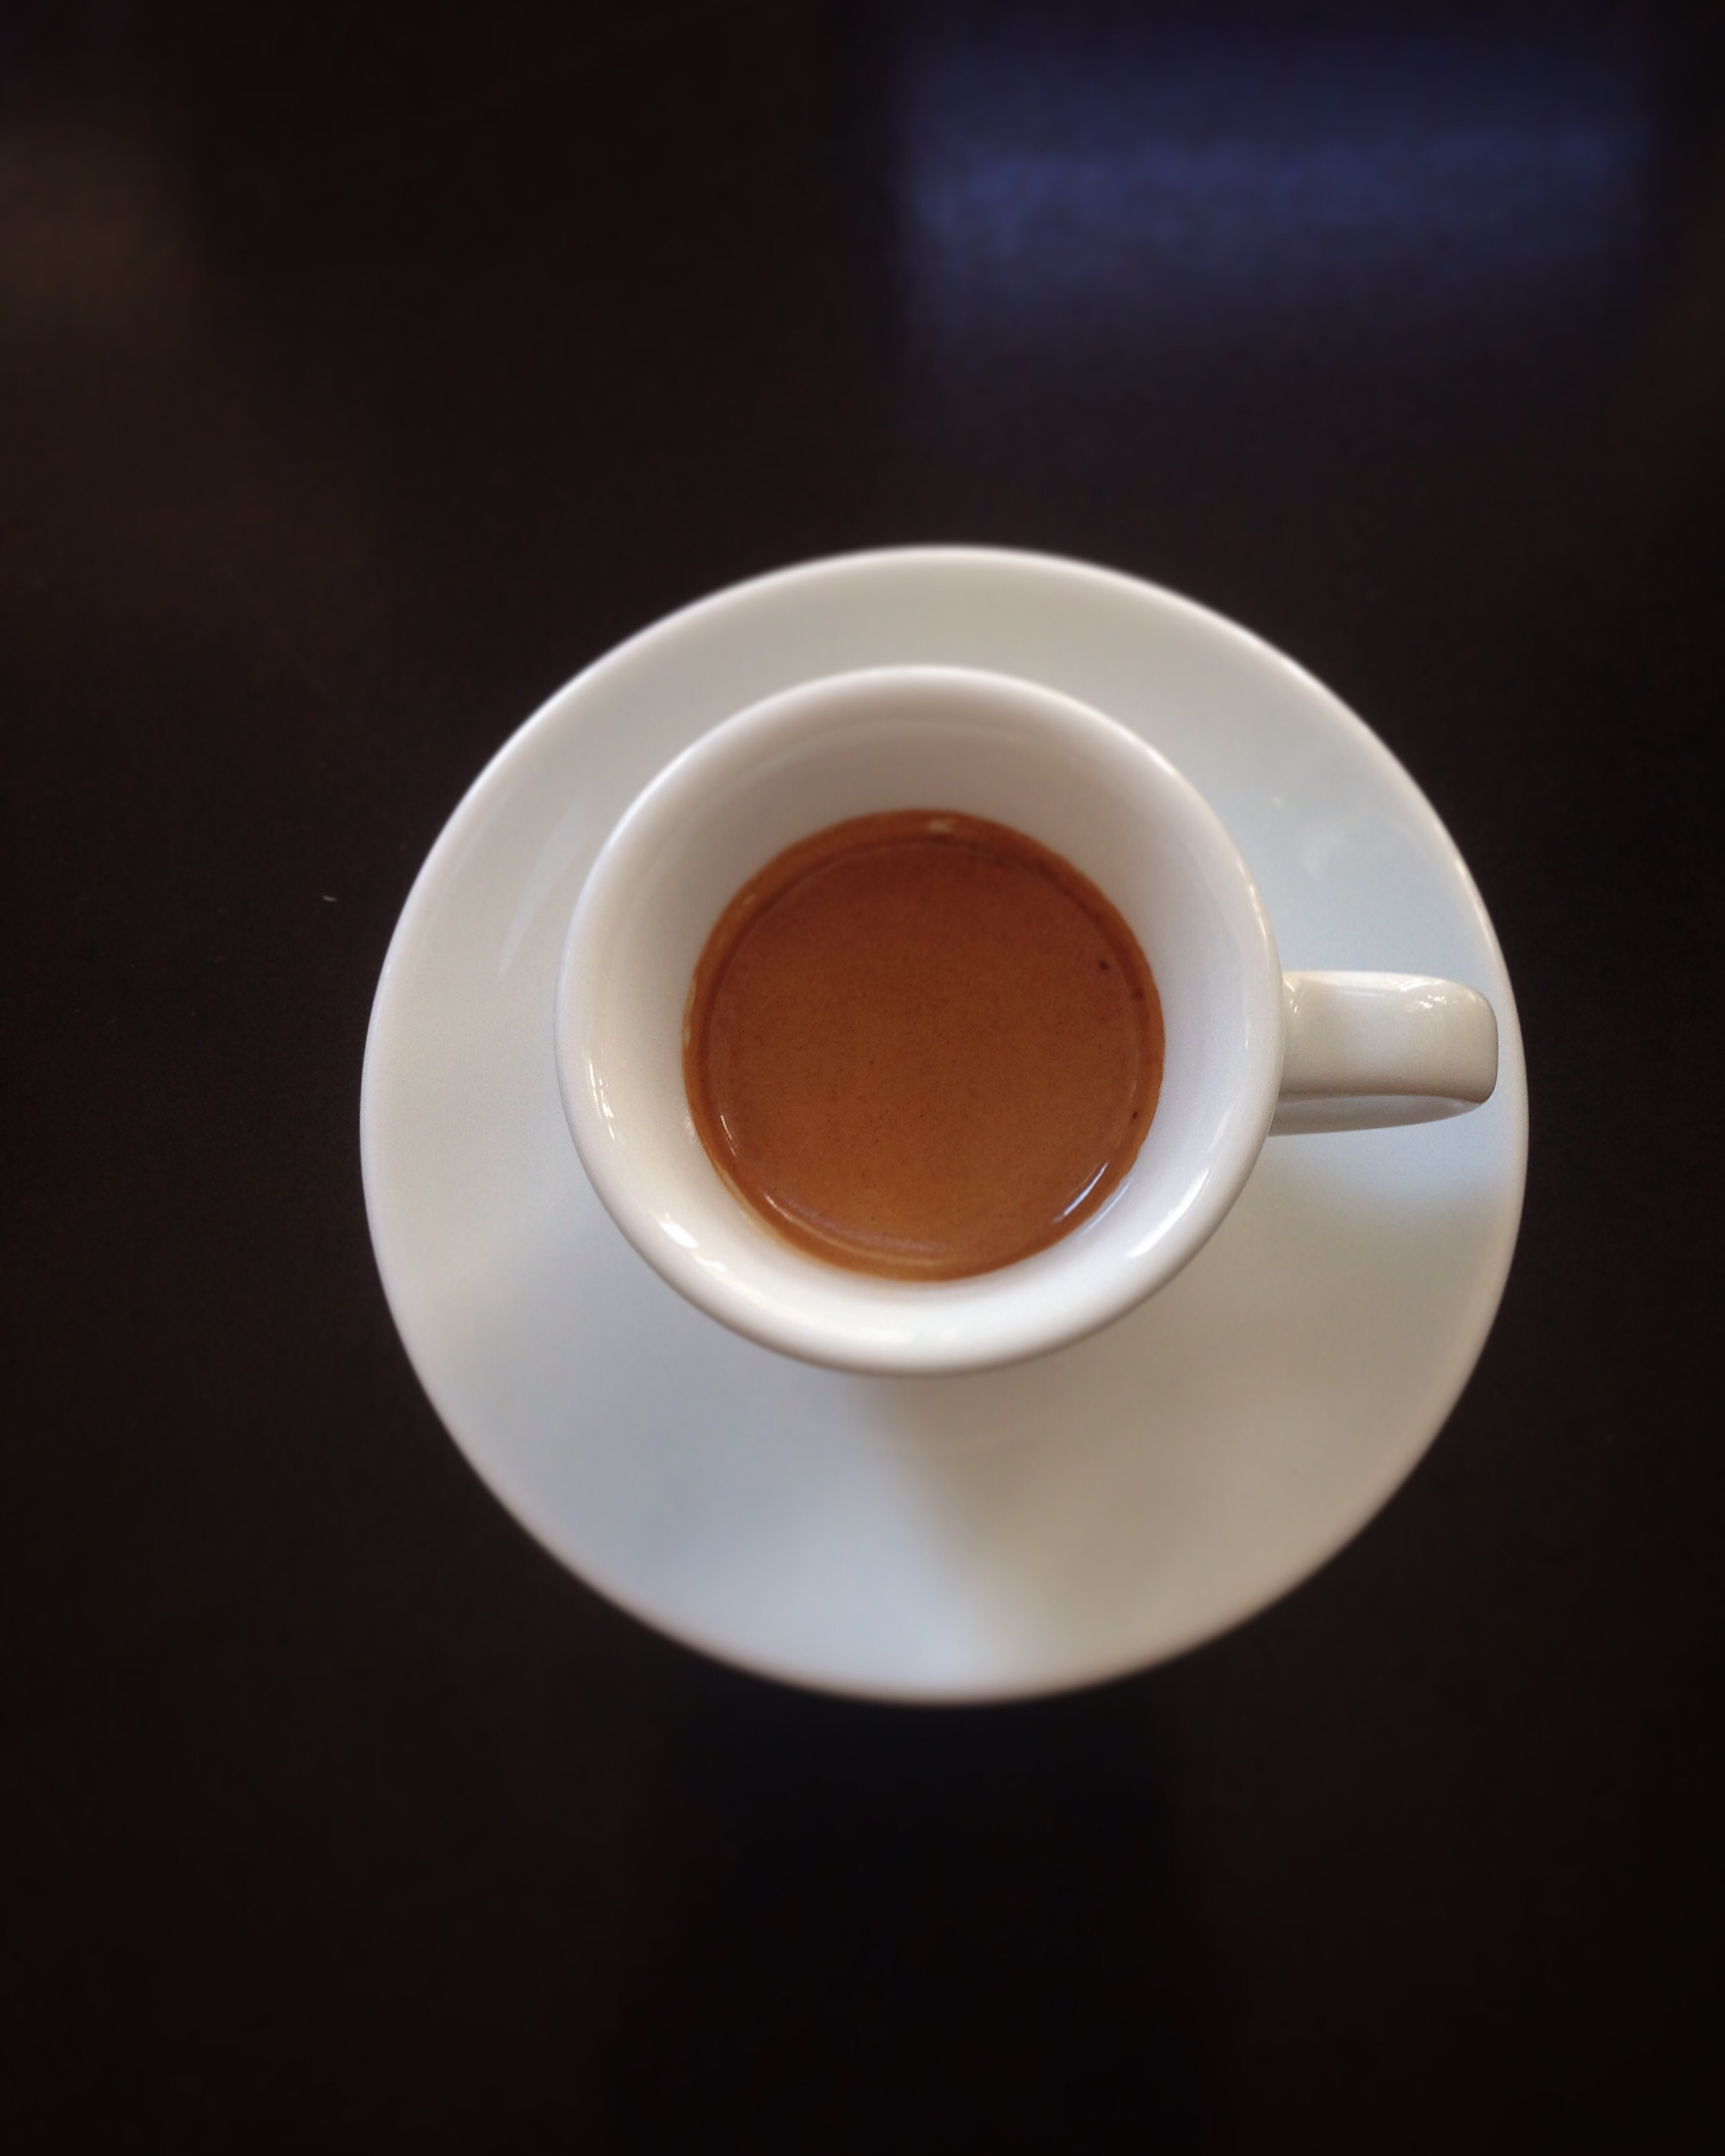
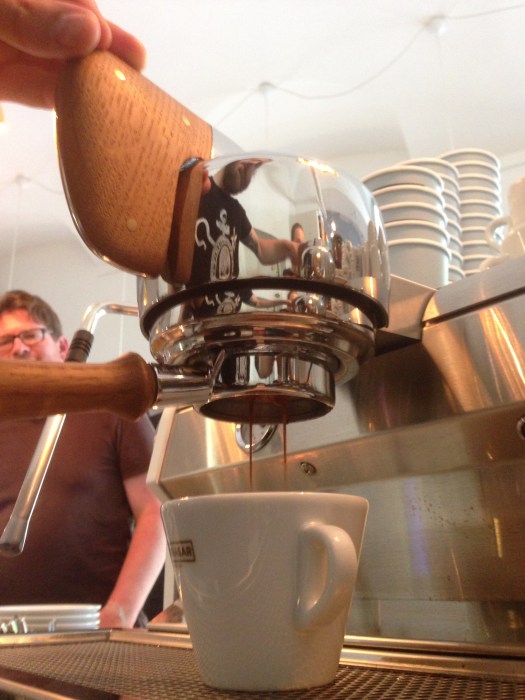
That’s the pic at the top of the blog. So, after not having espresso for about 5 days, I strutted into the airport lounge and spotting an espresso machine, asked for one naturally. As soon as the barista started making the espresso, I said “la!” i.e. no in Arabic and asked if I could make it. So, I clean the very filthy group head, flush it and ask for the coffee. To my horror, it’s pre-ground espresso, stored in a drawer and although there’s air condition inside, it’s like 40C outside. For a coffee geek like me, my mind is “oh no the moisture, the crazy unstable temperature will affect the coffee, which has already been pre-ground and for how long has it been pre-ground”. Resigned, I’m like, okay, here’s how to tamp. I attempt to tamp with wait for it,  the bottom of the glass, because the tamper is not large enough to cover the porta filter “aargh!” – this means that although some of the coffee will be pressed, the coffee on the border will not. OK!, so I now attempt to make an espresso – flush the group head and place my porta filter inside the group head and brew – what a disaster – the coffee is all over the place and the coffee resembles…. I’d rather pass.

The barista and his colleagues detecting deep disappointment on my face, then resorts to pull an espresso for me – I watch him and the only thing he does differently, which makes me feel happy, is that he cleans and flushes the grouphead before he pulls the shot and guess what – it looked a lot better than my attempt. So, how did he break the rules;

  • he used pre-ground espresso, as opposed to grinding on the spot
  • he didn’t measure the coffee, as opposed to using about 18-22 g for a double
  • he didn’t really tamp, as opposed to the rule of 30 pounds of pressure
  • the espresso machine was really hot – I’d guess close to 100C, as opposed to about 93-94.5 C

And that’s what I could see. So how did it taste. Not bad and above my expectations given the rule breakers. So, to conclude, the rules were broken but a decent shot ensured.


Never buy pre-ground coffee

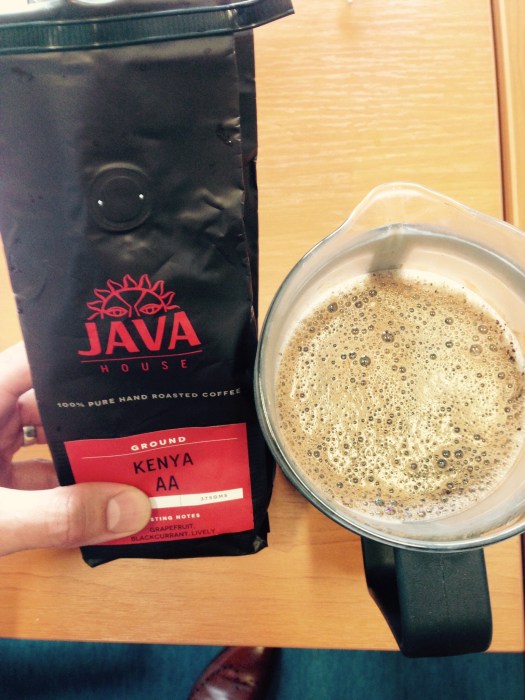
Okay, on this occasion, the coffee was bought for me. Whenever my colleagues travel and buy coffee, they bring it back for me to brew and serve them, which I try and do every Friday when I’m not busy – a rare scenario of late. If ever they ask me “whole beans or ground” I always answer, “whole beans”. On this occasion, a colleague brought me this bag from Kenya, apologising for having not brought back beans. I casually looked at the bag, Java House , Kenyan AA arabica, which looked well presented and was even more taken aback by the tasting notes of grapefruit, blackcurrant and lively. Again, sceptical I brewed it using my french press recipe of 60g to one litre of 95C water. Wow! guess what? There was a bloom on top of the coffee (a sign of fairly fresh coffee) and more importantly of all, I tasted a grapefruit acidity with a hint of blackcurrant. 


Okay, so that rule was broken.


Espresso is always brewed at 9 bar pressure for about 22-25 seconds

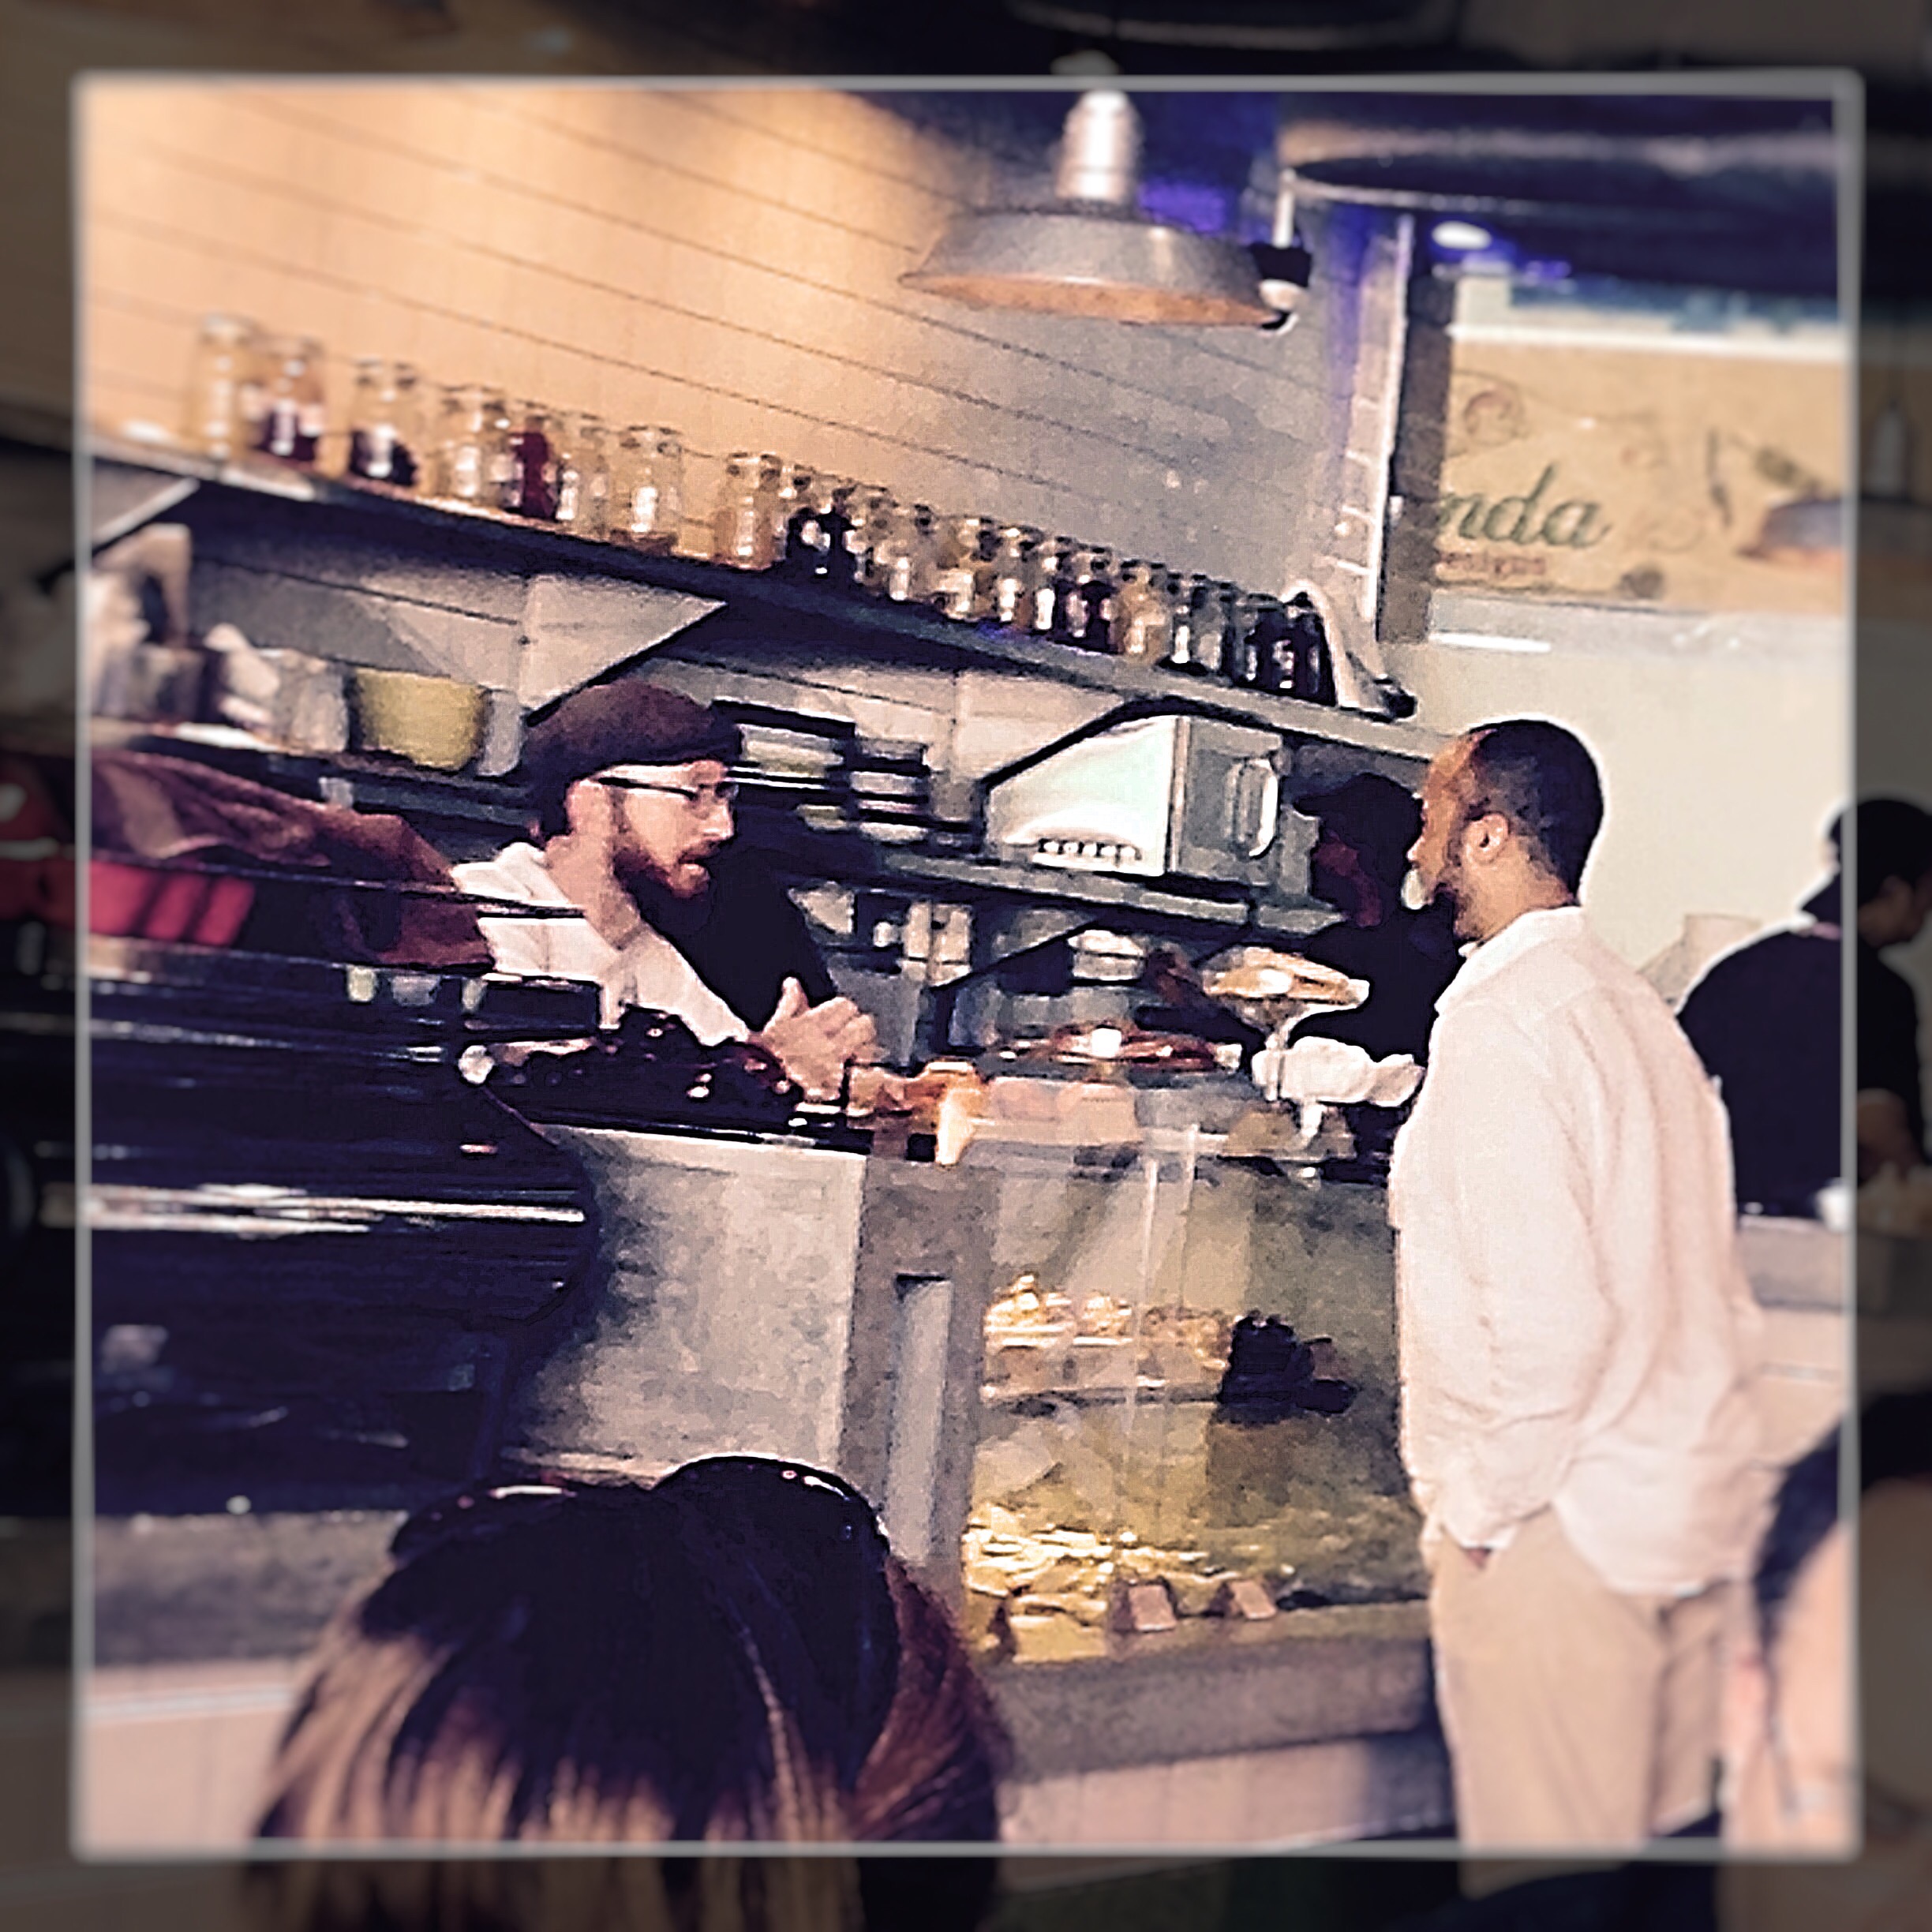
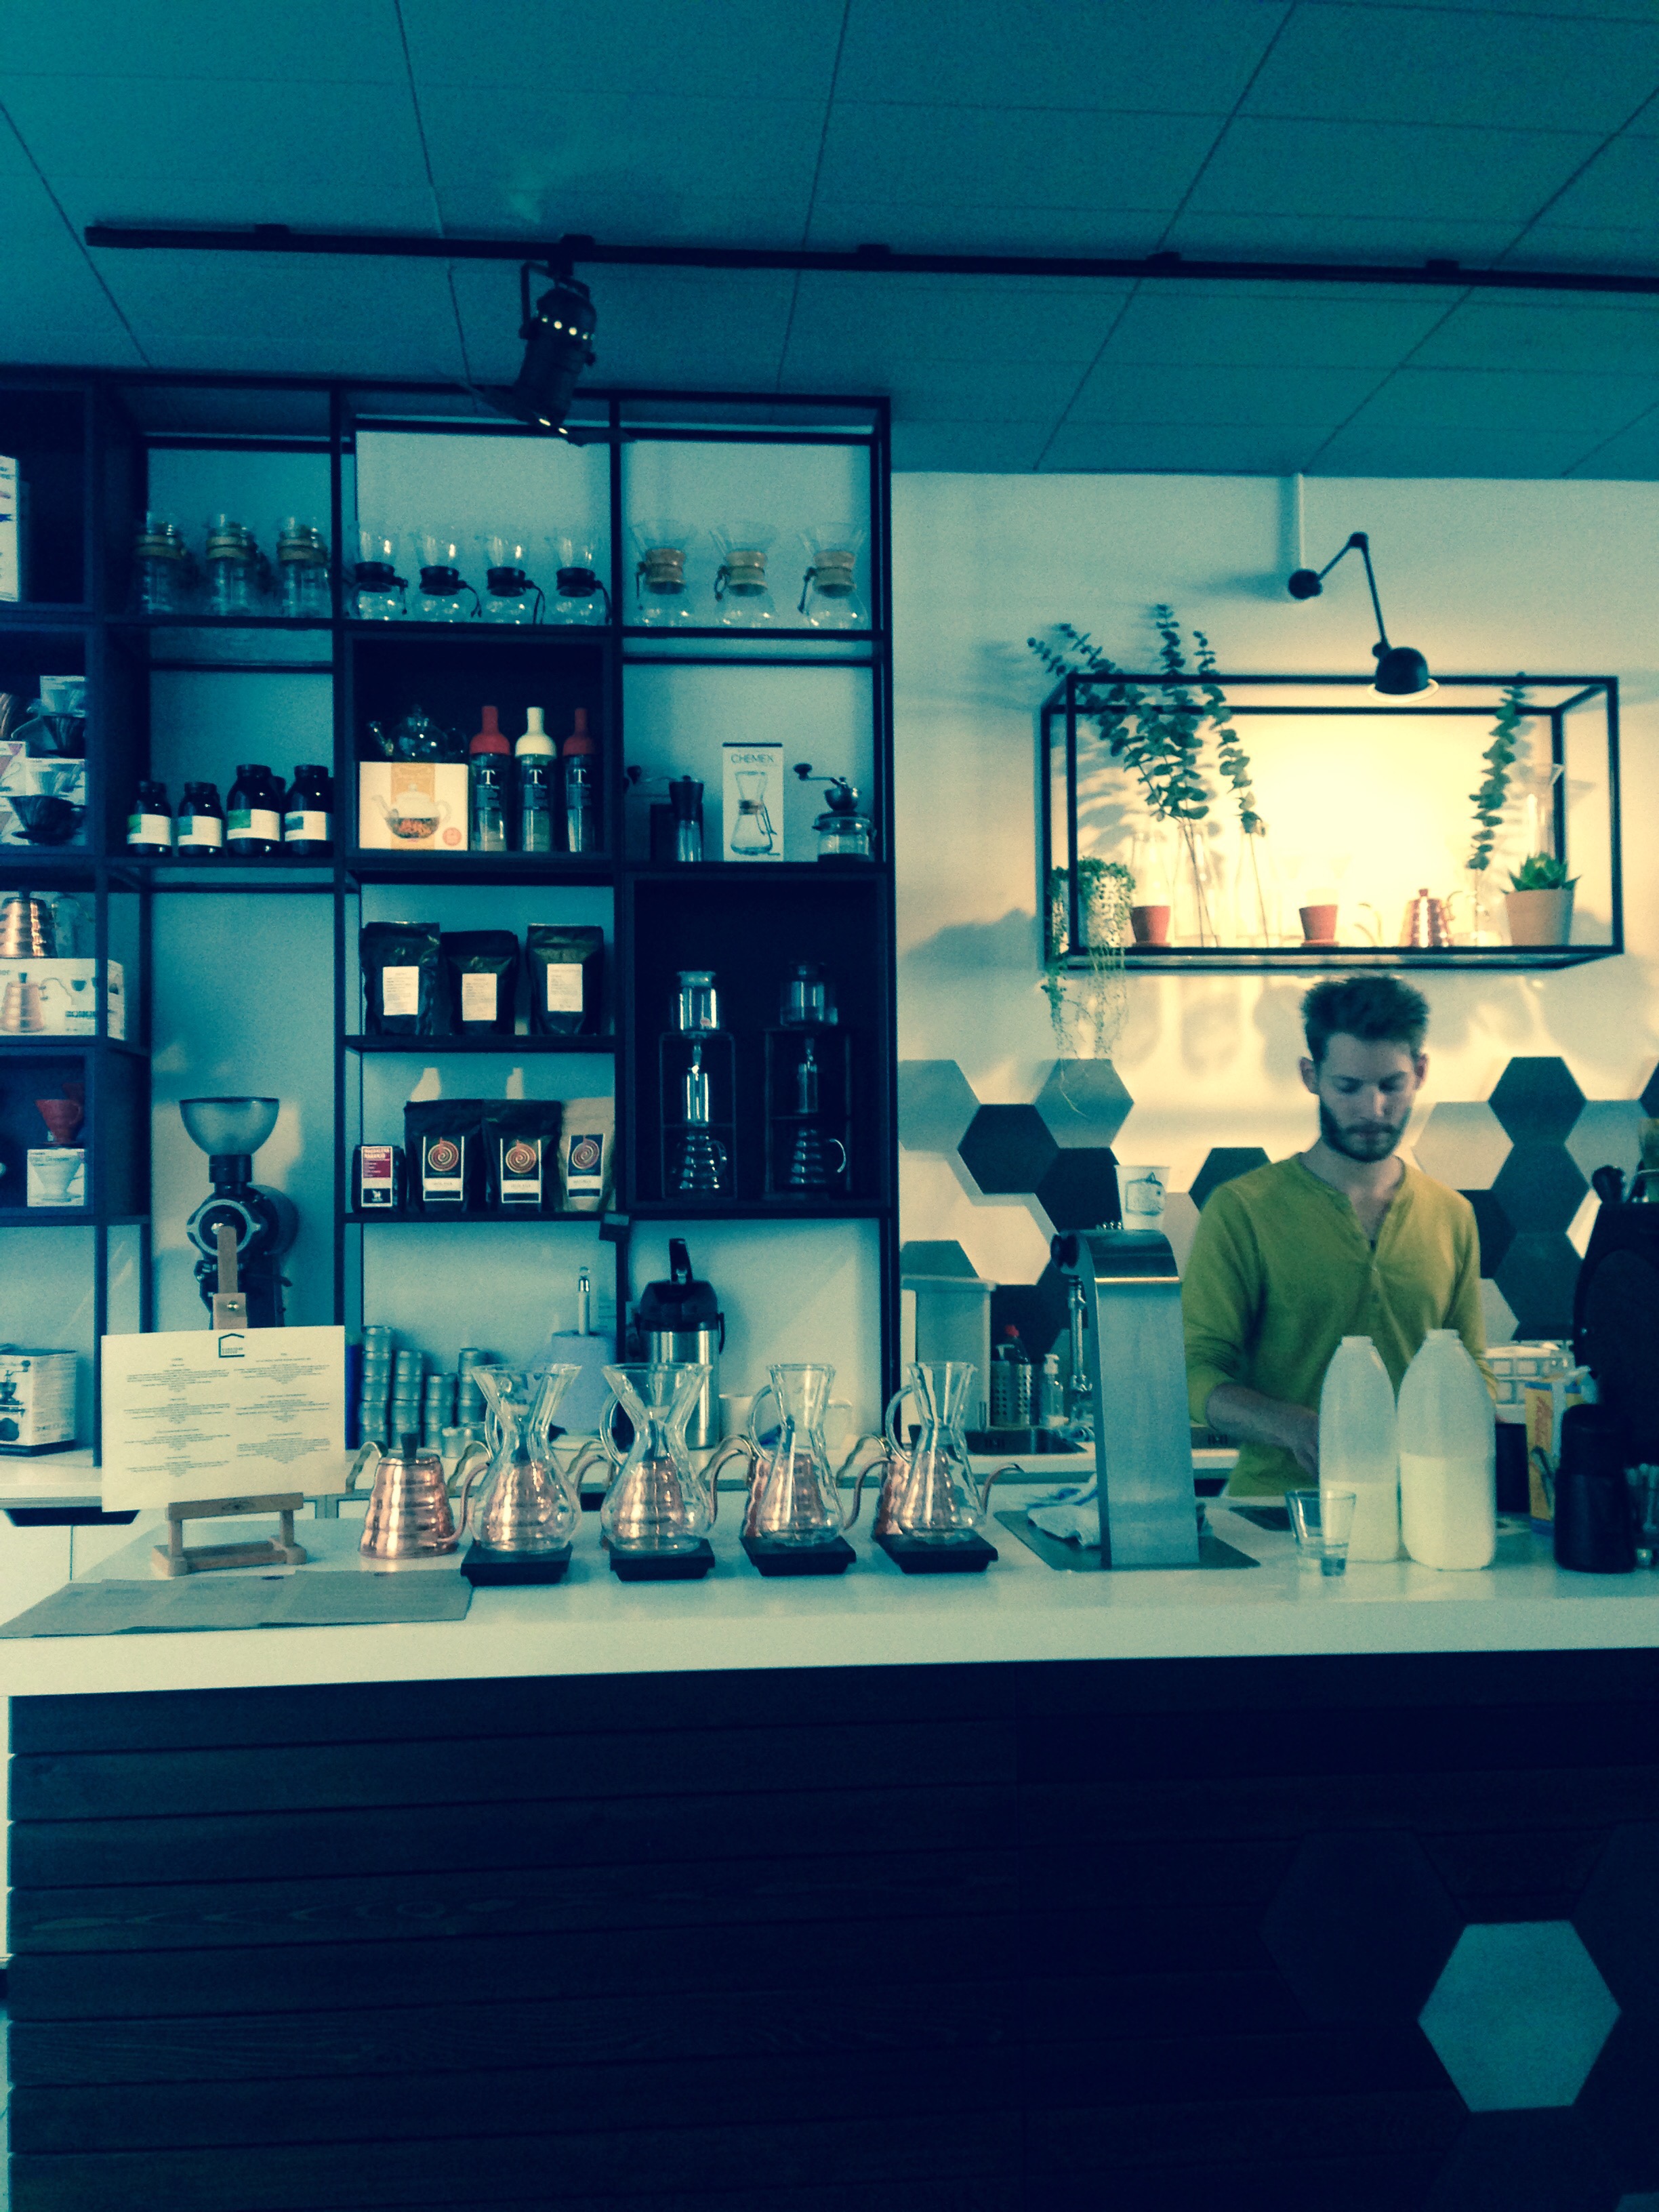
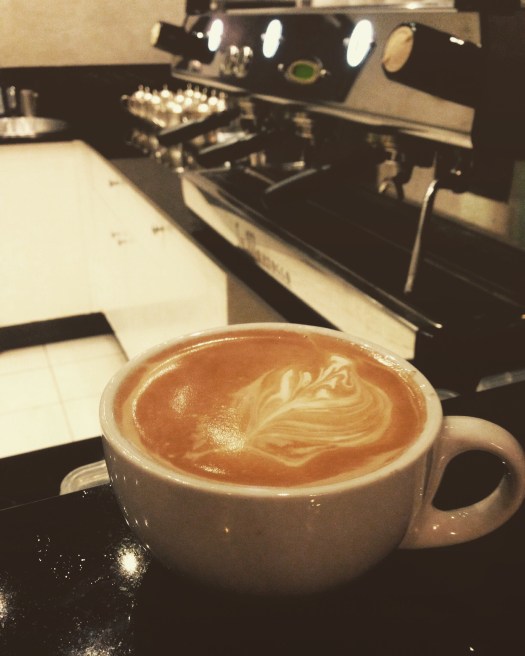
So, just this week, after Ramadan, I headed to my fave cafe in Vienna, Balthasar to check out their new espresso machine a Slayer Espresso machine. Otto, the owner, had been telling me for months that it was coming and he was so excited. In fact when I met him on Wednesday, I should have interviewed him as he relayed to me for about 4 minutes what the slayer could do. The gist was that you can brew at different bar pressures and for as long as you want, so I ordered a fruity espresso. In short to get a fruity espresso, it is brewed at 3, then 9 and then 3 bars of pressure over about a minute !!! what ? Usually, espresso is brewed at 9 bars of pressure for about 22-25 seconds with about 18-22 grammes of freshly ground coffee yielding about 25-30ml of espresso.

 So, what has changed ? The whole game with this type of espresso machine – the rule is, there is no rule, because you can now brew espresso how you like, like a recipe ordered to your preference “fruity, nutty, low acidity, high acidity….?” carry on.


 A really fruity cup with over medium acidity.


Just one more thing

Well! I’ve got to redeem myself somehow – we can’t just give up on the rules, ion not there’ll be anarchy.

So, as a prelude to my first experience, way back in January this year. I ordered a cappuccino at a top hotel in Zimbabwe (Meikles) because I spotted a La Marzocco GB5 machine, BUT. Watching the barista, I saw he used pre-ground espresso coffee, didn’t flush the group head, didn’t clean the group head, didn’t tamp with any real pressure, didn’t measure the coffee systematically, frothed a foam mountain and didn’t appreciate the kind of machine he was using. So, I stepped in and he was so willing to learn but on this occasion I didn’t touch the machine – I just guided him from across the counter. In the end, I got a good cup, with thick crema and although no latte art was present, it was along the lines.


To top it off, the barista was excited by what he had just learned, he was going to access youtube to learn more skills and watch latte art being poured. Yay! a job well done.

So, yes sometimes the rules can be broken and you may succeed but in general, adhere to and know the rules before you tamper (sic) with them.


Making Espresso: Take 2, The Serious Edit

  
Ok, so, let’s go into more detail on making espresso – let’s slow it down and take it step by step. For this, I’m going back to the origins of espresso. As espresso is an Italian mainstay, let’s check out what they say about making espresso. In summary, the Italians refer to  the 5 Ms when making espresso –

Mescla (coffee type or blend),

Machina (the type of coffee machine),

Machinadosatore (the grinder that grinds the coffee),

Mesura (the grammes of coffee used per espresso shot) and

Mano (the hand of the barista)

So, for me this means…

Mescla – I’m using an espresso blend from a recent Colombia Cup of Excellence lot, so it’s expensive, but the most important point is that it should be a coffee roasted for brewing espresso. Some professionals, brew using different blends, but for the vast majority, an espresso blend is used.

Machina – I’m using my newish espresso prosumer (a merge between professional and consumer) machine, a Profitec700, dual boiler machine with a rotary pump and a PID (i.e. I can change the temperature of the espresso boiler) and a whole lot more, but let’s say it costs more than $2,000.

Machinadosatore – I’m using a top of the range prosumer espresso grinder, a Macap M4D, yes, a grinder just for espresso

Mesura – I’m using approximately 18 grammes of freshly ground coffee for a double espresso. Most experts recommend always brewing a double shot – a single just doesn’t taste the same.

Mano – Well, mine of course – I will never participate in a Barista competition, but I’ve been making espresso, practically almost everyday since 2007, so I think I have a good idea how to make espresso.

Next, the process;

  1. Make sure your espresso machine is warm enough – mine’s is set to 93C and takes about 7 minutes to warm up.
  2. Pour your beans into the bean hopper of your espresso grinder and grind away.
  3. Make sure the setting is correct, whereby previously you checked that when you grind the beans, approximately 45ml of coffee comes out in 20-28 seconds – if it doesn’t, then keep playing around, trying not to waste too much coffee.
  4. Grind your beans right into the portafilter
  5. Flatten the ground coffee. Tamp with about 30 pounds or pressure
  6. Let water run through the espresso machine for about 5-9 seconds
  7. Then place into the portafilter into brew holder
  8. Extract your espresso
  9. And hopefully what comes out, is espresso. Too watery and coming out after 2 seconds, the grind is too loose, tighten it, so that if your grinder is set on 8, move it closer to 7, like on mine and try again
  10. If the coffee starts coming out after 10 seconds, the grind is too fine and coffee will be over extracted, bitterness.
  11. So keep playing around until you get that sweet spot – I must confess it is a lot of hit and miss, and can be quite expensive, excluding the cost of the machine and grinder (together over Euro2,000), but the beans, especially if you’re like me and buy really expensive stuff.

and here’s the video…

Making Espresso @ Home: The Video

So, I’ve been asked many times “how do you make ….. coffee” and then when I start explaining and for the who know me, I get kind of all geeky. The next question is “do you have a video on how to make this ?”And of course, I’m like “erm! no!” – looking all embarrassed. So, here’s a time lapse video of how to make espresso, BUT, I’ve got to go over the geeky bits first. What is espresso ? For this I’m going to revise my definition of espresso, which is;

In general, nine grammes of freshly ground Arabica coffee, tamped with 30 pounds or pressure, ground to a precision and brewed around 93-94.5C between 8 and 10 bars of pressure on an espresso machine that allows about 45ml (1.5 US fl ounce) of coffee to drip through into a cup in about 23-25 seconds, resulting in dark coffee with crema on top.

SOUNDS COMPLICATED DOESN’T IT ? The most important thing however, concerns the preparation; such as the type of coffee, the grind and the machine – if any of the essential elements are missing then you won’t get espresso but some mutant of it, which unfortunately you will get in most coffee shops.

So for my video, I used JB’s Kaffee espresso blend, with about 18.5 grammes of coffee for a double espresso, brewed at 93C. Enough talking, watch the vid;

Introducing the Chemex Brewing Method – It Takes All Kinds by Samantha Joyce

Chemex

Some background

The Chemex coffee maker was invented in 1941 and the iconic design remains unchanged today. Made of borosilicate laboratory grade glass, it is a sturdy heatproof vessel. Some coffee makers have plastic or metal parts that react with coffee oils and acids, but this is not the case with glass. For more than 70 years, generations have in turn embraced and ignored this simple coffee-brewing contraption. My Grandma had one, my Mom did not–and now I have one. The Chemex is in vogue again as pour over coffee gains popularity worldwide.

Deceptively Simple

To brew coffee with a Chemex, all you need is the Chemex itself, a Chemex filter, ground coffee and 200F (93C) water. But is it really that simple? This depends on your coffee personality: Are you a Coffee Professor or a Coffee Artist?

The Coffee Professor (more like Lameen)

At heart the coffee professor desires repeatable results like with any scientific experiment. To this end, the professor begins by washing the Chemex with a coffee machine cleaning powder solution and rinses and dries it thoroughly to remove any previous coffee residue. Next, fresh filtered water is placed in a variable temperature gooseneck electric kettle set to 200F (93C). It only takes a few minutes to get to the right temperature and then the kettle shuts off on its own. With the equipment prepped and ready, the professor is ready to brew.

The professor takes a Chemex brand paper filter and inserts it with the triple layer resting against the pour spout channel. The gooseneck kettle is used to wet the paper filter as it rests in place. The filter is then removed, the hot water is discarded and the filter is reverently put back into its place. This serves to pre-heat the glass carafe as well as rinse the paper filter to get rid of any “bland” smells.

Although the Chemex is an affordable brewer (for coffee geeks), the professor will use a burr grinder that costs a lot more than the Chemex. This coffee grinder is calibrated to produce particles that are considered in the ‘fine drip’ coffee range. A kitchen scale is used to measure out 36g of good quality coffee beans, which are then freshly ground prior to the brewing process (remember, coffee begins to loose its optimal taste after a few seconds of grinding). The freshly ground coffee is then placed in the filter. The Chemex, filter and coffee are then placed on the scale and the tare on the scale is set to zero.

With the precise control of the gooseneck kettle, just enough water is dribbled over the ground coffee to moisten it. This allows the coffee to “bloom,” a chemical process where carbon dioxide is released. The fresher the coffee, the more it blooms. After a specific amount of time (30 seconds to 1 minute depending on coffee ideology) the professor moves from pre-infusion to a methodical wetting of the grounds. In a concentric motion, water pours evenly into the Chemex until it is near the top. This cycle is repeated until the scale records 25-30 US fluid ounces (730-800 grammes) of water. From coffee bloom to completion should take no more than 5 minutes. If the coffee drained faster, the grind was too coarse and if the coffee drained too slowly, the grind was too fine. In this manner the professor fine-tunes the Chemex brewing method.

The Coffee Artist (Samantha – the writer)

The coffee artist knows inherently what it takes to make a good cup of coffee through trial and error or through muscle memory over time. My mom called this type of estimation, “eyeballing it.” I fall squarely into this camp. I do not have the perfect coffee brewing equipment; I make do with what I have in the kitchen.

My kettle is heavy and hard to pour – It was a wedding gift. I boil the water and then pour it into a glass measuring cup that has an okay pour spout. I pre-wet the filter (barely) and then swirl and unceremoniously dump the hot water from the carafe. That is my nod to the pre-warm, pre-rinse, residue removal phase. I have a standard coffee scoop and I use 5 or 6 of those. My coffee is delicious and locally roasted with the roast date printed on the bag and since I do not yet own a burr grinder I buy it pre-ground.

The coffee smells so delicious in the Chemex that I cannot wait for it to bloom. I pause for maybe 10 seconds to admire the pretty brownie cake-like surface and then continue to pour until it fills the Chemex to the top. As it drains out, I add more hot water until the level of coffee in the carafe reaches the bottom of the wooden collar. Then I compost the filter and spent grounds. While I enjoy the brew process, my desire is to fill a mug with delicious freshly brewed coffee as soon as possible. If I took a few shortcuts along the way, is mine better/worse/different than the coffee professor’s exacting methods?

Vive La Difference!

I think there is room for many coffee brewing styles in this world. When I go to a pour over bar I appreciate that they brew with accuracy and the goal is to attain an enjoyable and repeatable cup of coffee. Now that you know about the Chemex method of coffee brewing, you are welcome in either camp, just don’t forget to bring fresh coffee.

This article, with very slight editing by moi (Lameen) was produced by Samatha Joyce, a writer for seattle coffee gear – http://www.seattlecoffeegear.com/

I’m Blending….

I'm Blending: The Beans by Lameen
I’m Blending: The Beans a photo by Lameen on Flickr.

I’m blending, yipee ! But what exactly does that mean ? In summary, it means that I’ve got my experimental hat on again. Having changed my coffee bean roaster at my caffe, Escape Caffe, I’ve started sourcing beans from another roaster but this time I’m sourcing single estate coffees from different regions of the World. I’m experimenting because part of my character loves change and getting to understand things from the bottom right up. Have I lost you ? It means that I want to understand what makes a good espresso blend. So, I’ve been trying to build up on my basic knowledge of taste profiles.

In general, and I wish to emphasize, GENERAL, most coffee roasters have a formula for blending coffee for espresso preparation, which goes as follows:

A Brazilian for BODY,

a Central American for ACIDITY and an

Ethiopian for natural SWEETNESS.

One of your main goals in blending should always be to get a BALANCE, as you don’t want one coffee taste to dominate. In principle, very high quality or distinctive coffees (lots of black fruit juiciness, acidity and boldness/heaviness) are seldom used in blending for espresso. WHY ? Because they will dominate the blend. Think of it like making a soup/stew – if you cook – you don’t want to put lots of chillies in with subtle tastes like basil, as you will kill the basil taste with hot and fiery chilli. This is one reason why you won’t see Kenyan coffees in espresso blends. I can’t imagine blackberries tasting sweet if exposed to a harsh preparation process.

OK! what do we mean by BODY in the case of Brazilian arabica coffees ? We mean body as in the density of the liquid. IOf you taste/drink lots of good coffee, then you will know that some coffees taste light. Sure, they are both liquids, but orange juice does not have the same texture/body as apple juice.

Now, ACIDITY. I’ve spoken at this at great length before, so won’t go in to it too much, but in summary, it’s detected by the sharpness in taste when you drink coffee, resonate of citrus fruit. So, when you blend, although essential to round off the taste around your tongue, you don’t want it to dominate either, if not it could confuse your tongue with sourness. After all, orange juice and mlik (think of a cappuccino) don’t look nor taste nice together. Personally, I’m not in favour of medium to high acidity in espresso based drinks.

Finally, SWEETNESS. Very essential for coffee and to dispel the misconception that coffee is only sweet when you add sugar. However, by sweetness, we don’t mean sugary sweet, but more like natural sweetness, such as the type found predominantly in honey and sometimes elevated in dried fruit like dates, raisins and figs.

So, what are you looking for ? As the coffee roasters rule – and yes they do, as they control what you taste and more often than not, they roast the way they like coffee to taste – you are looking for a coffee that has a nut like character, with a hint of chocolate (and sometimes cocoa, because most people love the cocoa family) with natural sweetness wrapped around your tongue, well balanced and with medium acidity and a lingering finish. Wow ! what a mouthfull, quite literally.

For nuts, think almonds, hazelnuts and macadamia (if you are lucky) and more specifically BRASIL.

For hints of cocoa, toffee, subtle citrus fruitiness, think Central America, like COSTA RICA, GUATEMALA.

For honey like sweetness and sometimes hints of red berries think ETHIOPIA.

If you favour spices like vanilla (hard to get), cinnamon, etc then in general look to the East like INDONESIA, INDIA, PAPUA NEW GUINEA.

BUT, of course, coffee is a lot more complicated than this, so sometimes the basic rules above can be broken by sourcing coffee from a very high quality single estate farm, roasted by a very experienced cupping and roasting master.

I also don’t want to get into the wet-processed and naturally dried process of coffee as these too affect tastes and how you blend, but in general, a lot of top roasters seems to be ignoring naturally dried coffee when blending. Some also use just Central American coffees in their espresso blends. Personally, my ideal espresso would have hints of almonds, vanilla, caramel, buttery toffee, dried figs, medium to low acidity, balance, smoothness and lingering taste. Fussy ? Yes I am. I sometimes get this from drinking Square Mile Coffee Espresso blends and just this morning from Verve Coffee Roasters (my next post God willing).


So what did I experiment with ? First up I used a Brasilian for body, a Malawian for bursting chocolate and a Cup of Excellence Guatemalan for acidity, sweetness and for balance. The result, a bit mellow, easy to drink and favoured by most.

Next up, I tried just two coffees, the Brazilian and the Guatemalan COE. The result, bursting with energy, toffee, caramel and customers saying “Wow! what coffee is this, can you get more ?”

And so for my next experiment…….

The Diary of a Moka Pot: The Essence of Italian Caffe Culture

Making Moka Coffee 3 by Lameen
Making Moka Coffee 3 a photo by Lameen on Flickr.

It’s almost 7 years from the day when we first touched down in Rome for a family holiday. Hearing that I liked coffee, my cousin’s Italian husband handed me a Bialetti moka pot and some ground Lavazza coffee, with a short explanation on how to use it. A little skeptical, I tried it on the first morning and was amazed at the taste (Yes ! back then, I only drank expensive instant coffee and/or French Press coffee). For the first few days inside our rented holiday apartment, I only had coffee in the morning, but after the 3rd day, I got used to having it at least twice a day. On departure from Rome, I thanked my cousin’s husband for introducing me to the moka pot.

On arrival back home in Vienna, the craze began – I needed a moka pot and fast. Back then, believe it or not, even in Vienna, Austria, it wasn’t easy to find one and I was kicking myself for having not bought one in Italy before we left. I found out later that Italians never leave Italy without one and I should have followed that concept. In any case, I goggled Bialetti, found their website and was glad to see that they had an on-line sales option. BUT, alas it wasn’t that easy – being frustrated with trying to buy a moka pot on-line, I decided to call them and guess what, their English voice-mail said they were on holiday for August – how can a company go on holiday for August ? In any case, after many lunch hours spent up and down the city of Wien (Vienna in German), I eventually found a 6 cup one. Afternoons at work were not going to be the same, with colleagues popping their head into the mini-kitchen, drawn in by the smell of Italian style coffee (the aroma of making coffee on a moka pot is amazing), wondering what Lameen was doing. Those brave enough, joined me, after all it was six cup moka pot. On that, six cups in Italy, really means six espresso style cups.

AND that folks is the beginning of “From Coffee with Love“. I am a bit puzzled that I haven’t related this story here, because from then on, I went full-on into coffee. I began with a Bialetti Brikka (pictured above), which is a moka pot that produces crema and then I went on to espresso machines and now I have a caffe, Escape Caffe, as you all know.

So, here’s a quick step on using a Moka Pot, my way of course.

Assume you have grinder, good beans and scales (optional in this case) and of course a Moka Pot.

1. Unscrew your moka pot and pour enough cold water into the lower cavity (about 100ml for a 3 cup) until it us just below the steam release device – this is easy – there’s a hole for the outlet inside the bottom of the moka pot.

2. Place the portafilter on top of the cavity containing the water.

3. Grind your coffee on a grind coarser than espresso but not as much as for a French Press. So, for example if you have a grinder that ranges from 1 – 10 with espresso at 2 and French Press at 9/10, grind on 4.

4. Place the ground coffee into the filter holder till it fills it and lightly tamp with your fingers (see below). This is the reason why scales are not essential for this method, because you should not put too little and not too much, just enough to fill the filter. I’m guessing for a 3 cup, about 13 grammes.

5. Screw the top on gently and place onto a hob turned to full, because you want it to boil. A note, Bialetti Moka Pots are made with aluminum because it is the fastest heat conductor – i.e. it takes on more heat than any other metal that we know off so far. This means that the moka pot heats up very quickly. Nowadays, stainless steel ones are made, with a heavy price tag, but good old aluminum is best.

6. First Light – Signs that you did the right thing – a little coffee escaping.

7. It’s coming – yes, the excessive heat and steam building up inside the bottom part of the moka pot, pushes the coffee through the sieve an into the top cavity – the wonders of a simple but effective creation.

8. Whoooshhhhh ! is what you hear and this is what you see when its finished.

You can enjoy black with a little sugar ( I recommend a little for this method) or with cream, yum.

Caution: Don’t place the moka pot anywhere after it has finished, except on a hot plate, as the pot is still very hot. Let it cool down before you wash it by emptying the puck (used coffee) and rinsing out the base and top parts.

The Moka Pot is really simple and when I introduced it to my staff at Escape Caffe, they were amazed by the taste and wanted more. We plan to start selling them soon.

Ciao e buon giorno

The Two Minute Scoop

The 2 Minute Scoop by Lameen
The 2 Minute Scoop a photo by Lameen on Flickr.

What does that mean ? In short, how I make coffee using the French Press/Plunger/bodum Method. After all, it is Bastille Day (French Independence Day) So, I’ll try and keep this to a two-minute read.

1. Get your beans ready, weigh them, 20g and place in your grinder (Yes ! you should freshly grind before each cup for maximum enjoyment)
2. Boil your water and as soon as it is boiled, measure out 260ml.
3. Grind your beans on a coarse setting. If using a Solis Maestro (comme moi) or good quality shop bought one (don’t expect to pay anything less than $100/£70)
4. As soon as your coffee is ground, place into your French Press pot. For my Bodum Columbia, it doesn’t need to be warmed up, as it is double walled, but if you have a glass one place boiling water inside for a minute and rinse it out before placing the ground beans inside.
5. Pour 260ml of the boiling water into the French Press.
6. DON’T TOUCH IT, DON’T STIR IT, JUST LEAVE IT, BUT POUR IN A CIRCULAR MOTION. See the bloom below.

7. Put your timer on for 2 minutes.
8. At the end of 2 minutes, SCOOP the froth or the “French Press Crema” off – Hence the 2 minute scoop”.
9. Place the French Press top on and plunge.
10. Pour out a little and pour into your cup to enjoy.
Ciao, deux minute !

%d bloggers like this: