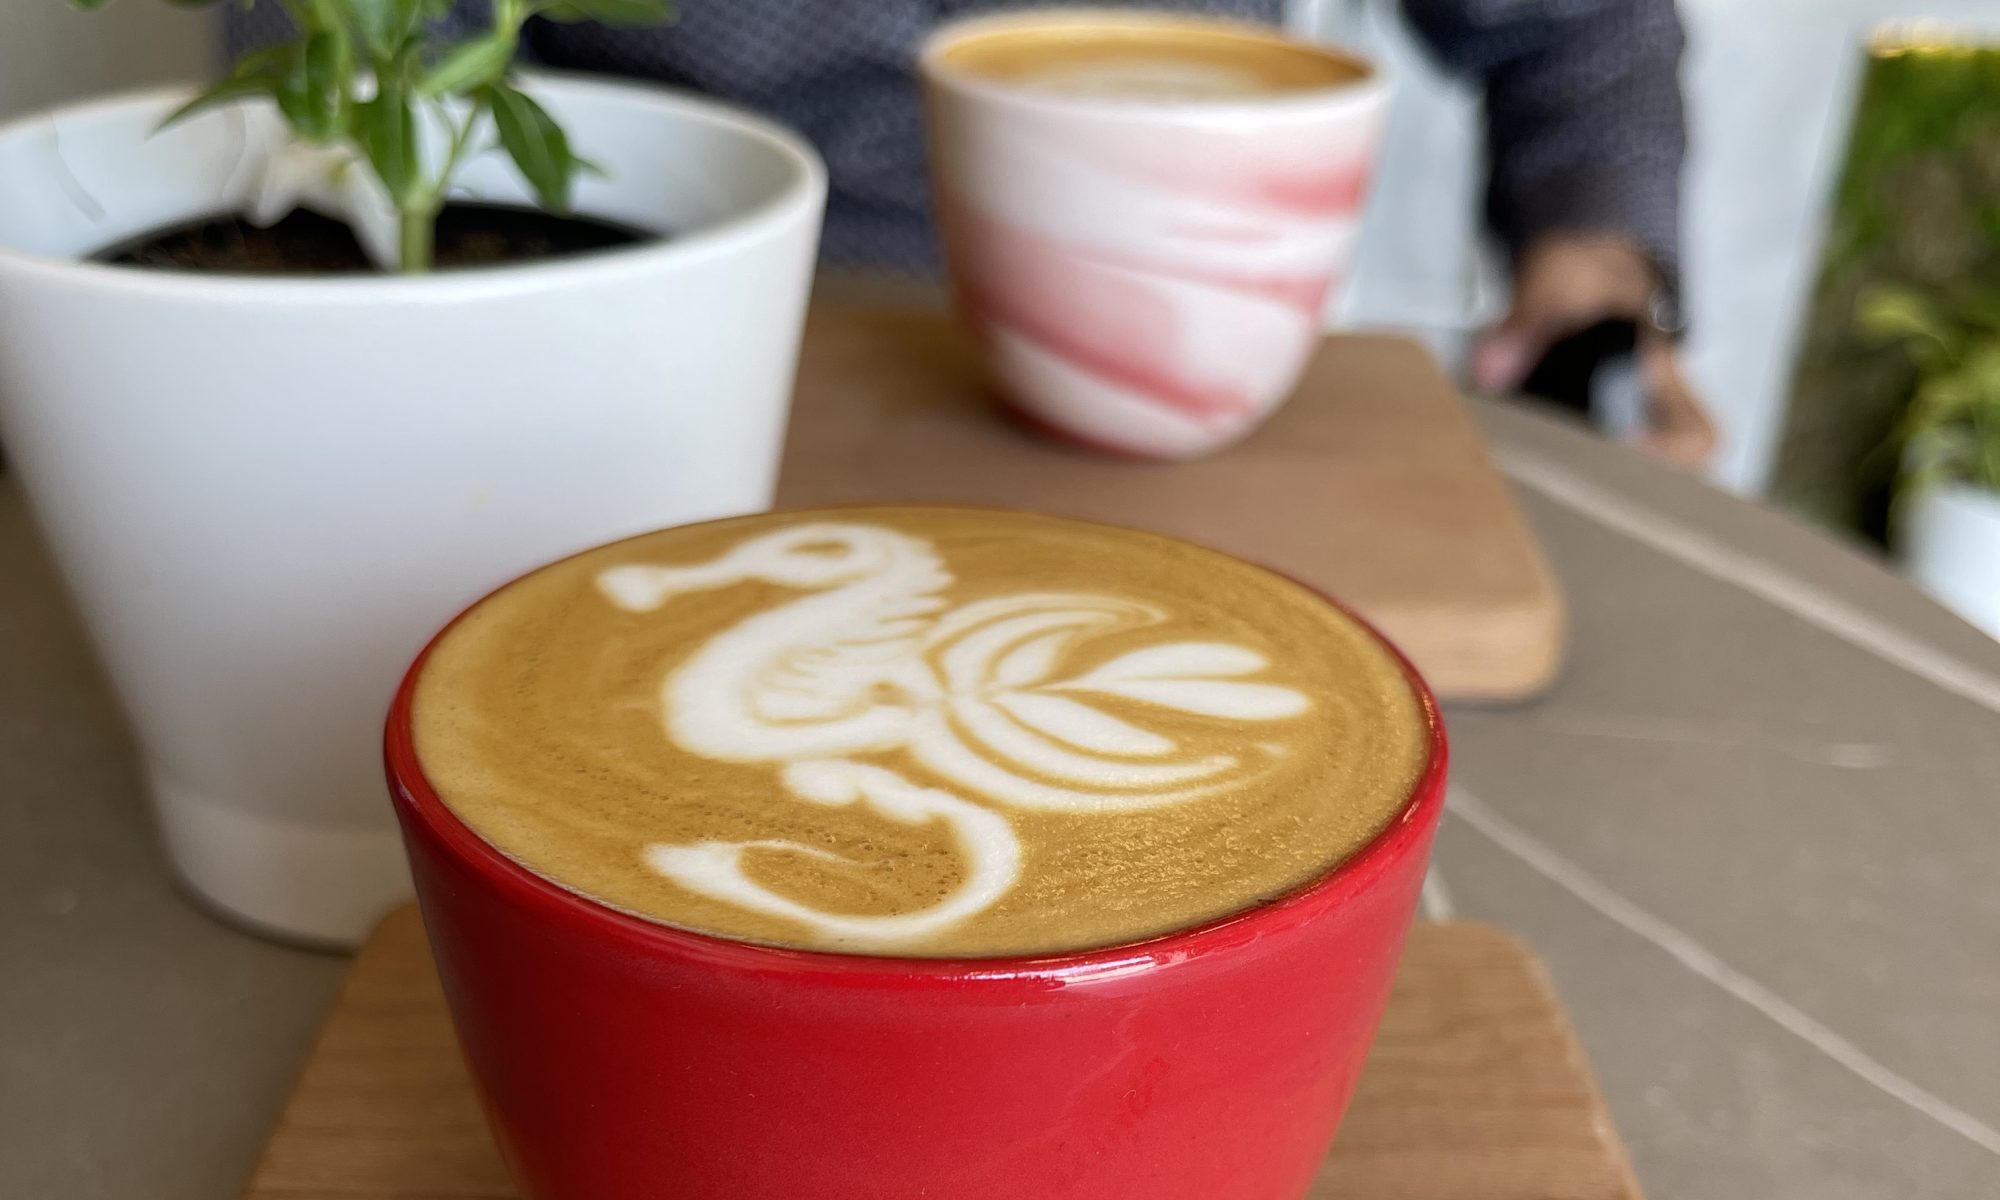
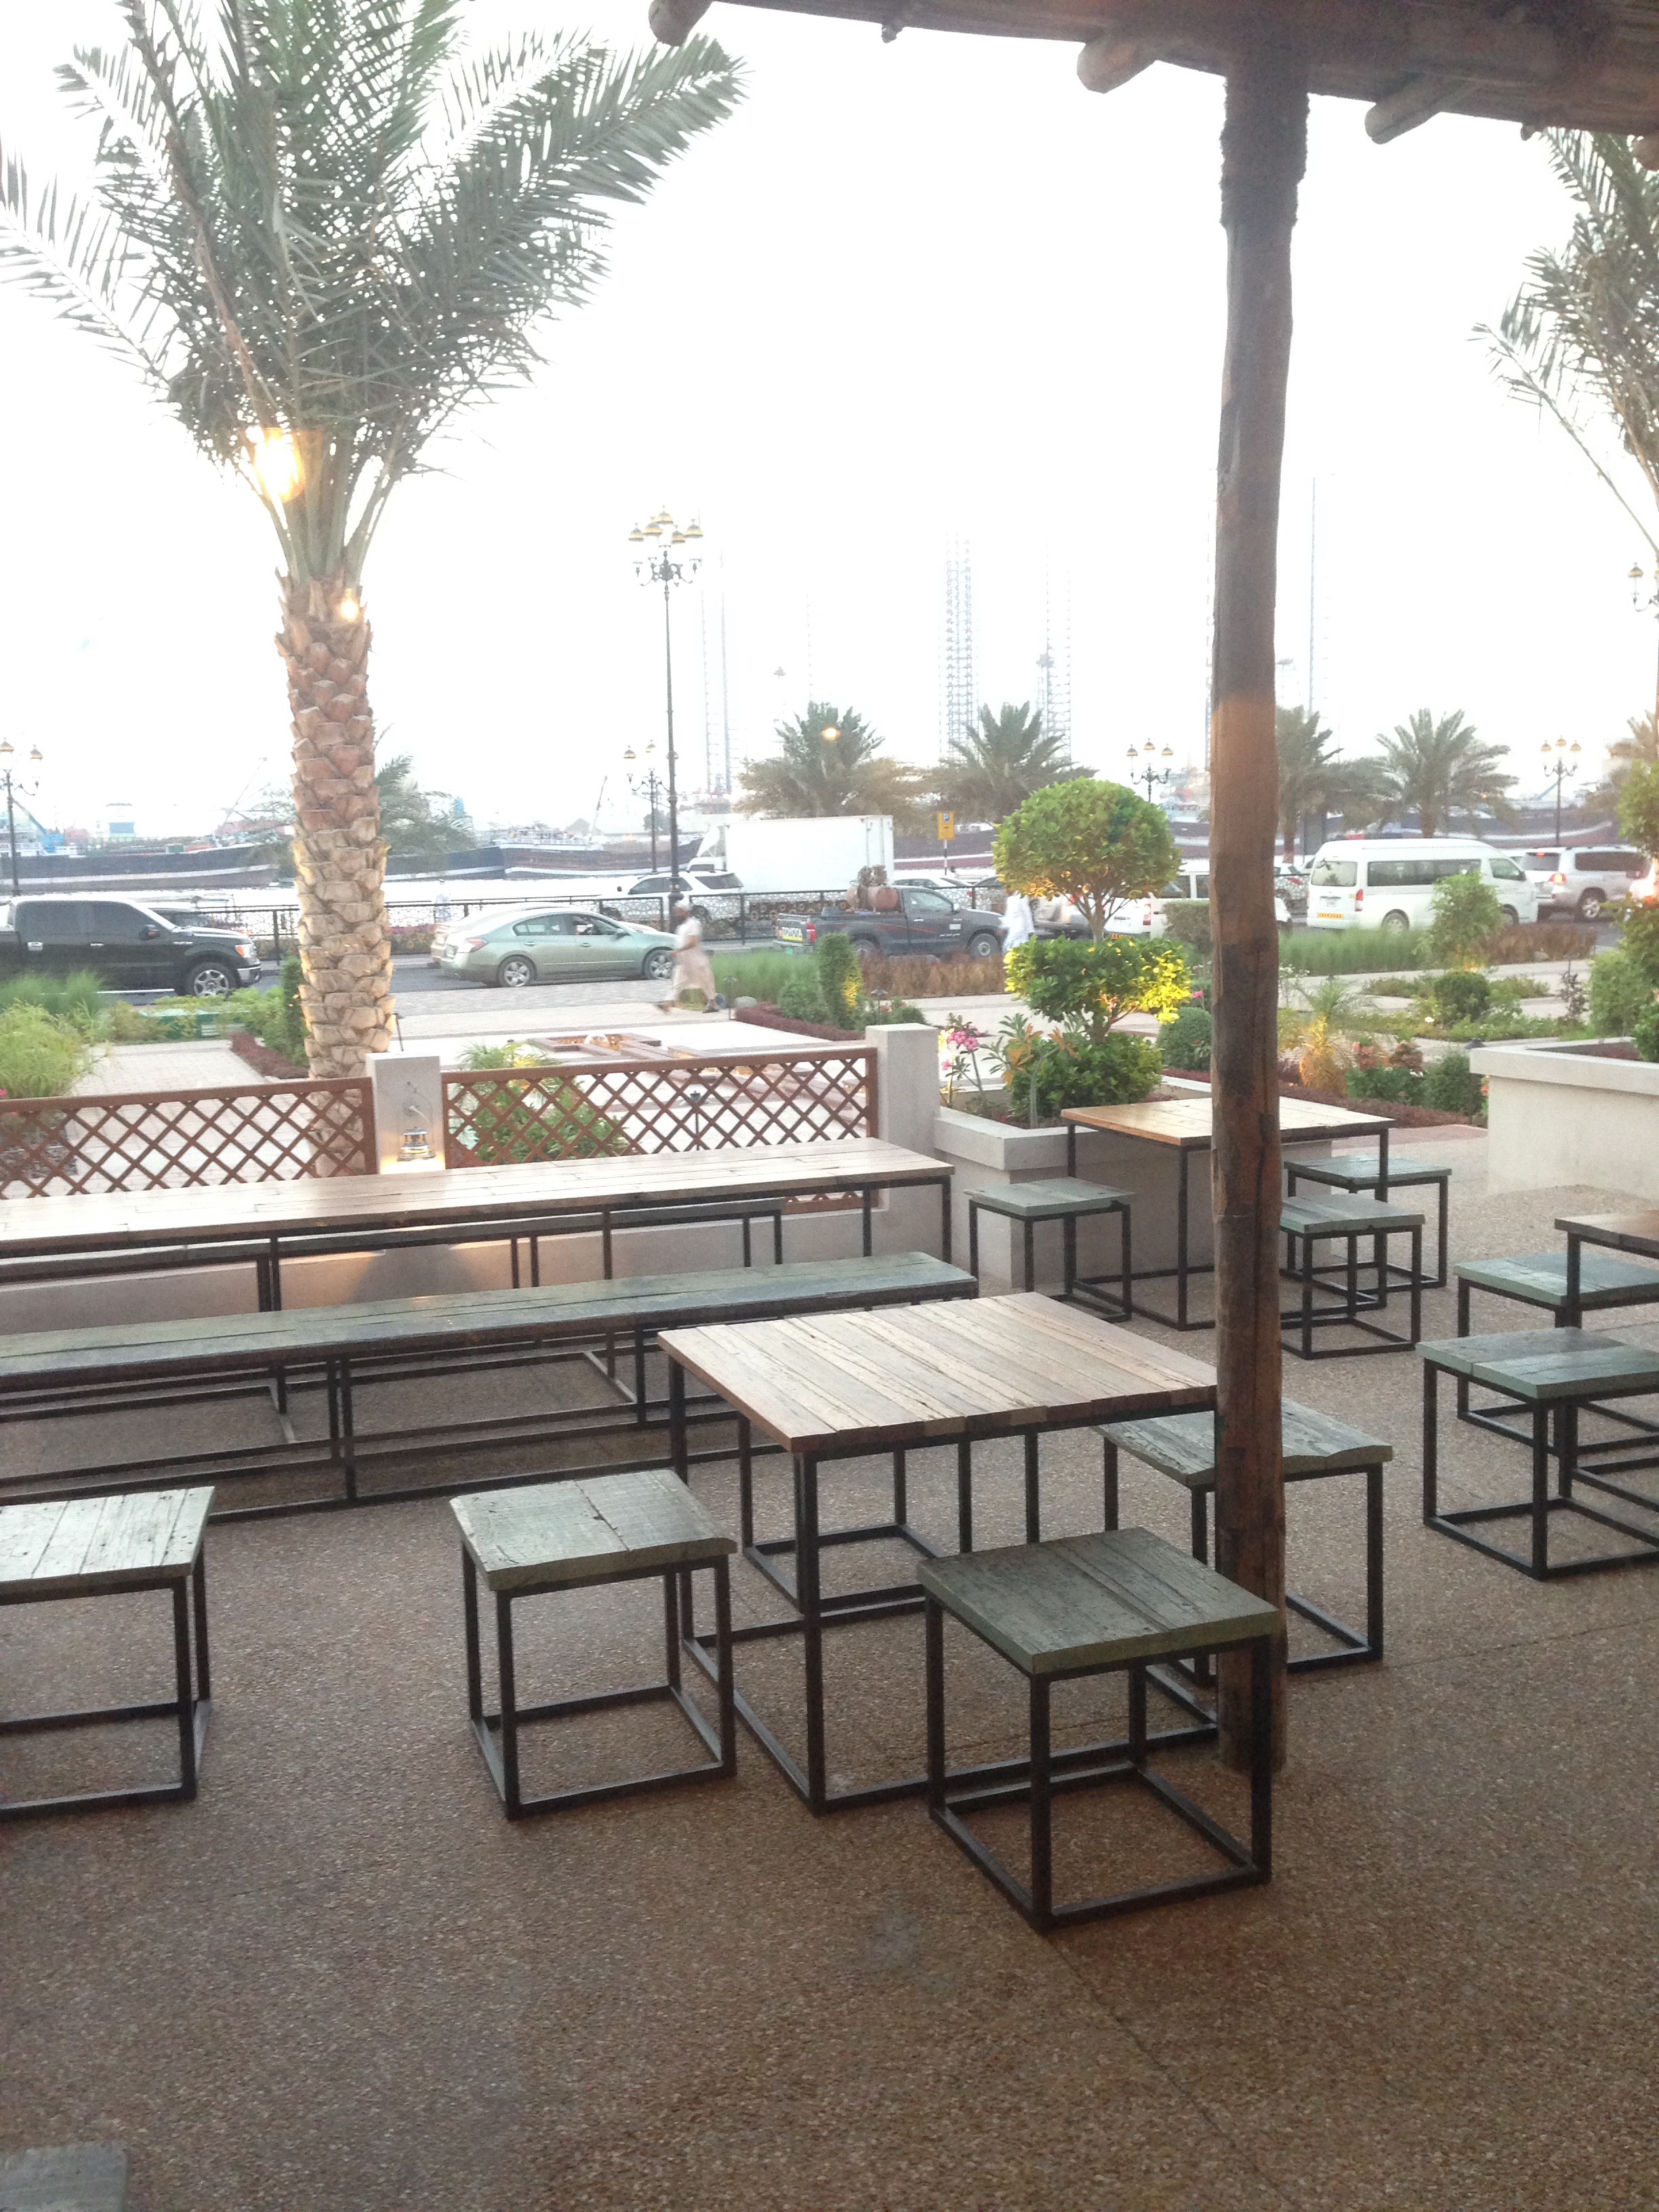
It always gets bigger and better in Dubai when it comes to events and the World of Coffee 2025 Edition followed suit. I only had the opportunity to attend one of the three days but still didn’t get to experience all the halls, perhaps that’s because I over COFFEE’D myself and lost count after my tenth cup – The emoji of distress 😫 comes to mind. In summary WOC Dubai is truly becoming a global coffee even and is here to stay by the looks of it, featuring all the coffee tools, suppliers, coffee farmers you can think off together with world champions gracing the stage and preparing coffee for you. Nevertheless, here’s a quick round up of my adventures;
Meeting Martin Wolf
Martin Wolf in action
Crowned recently as the World Brewers Champion, Martin used to make coffee for me at my fave coffee shop in Vienna, Austria, Balthasar, so not only was I pleasantly surprised to learn that he would be visiting but that I bumped in to him (pic with him at the top of my post) but that he got to brew coffee, which I got to taste again. What did I learn? That he uses the WDT for filter coffee (post on my Instagram).
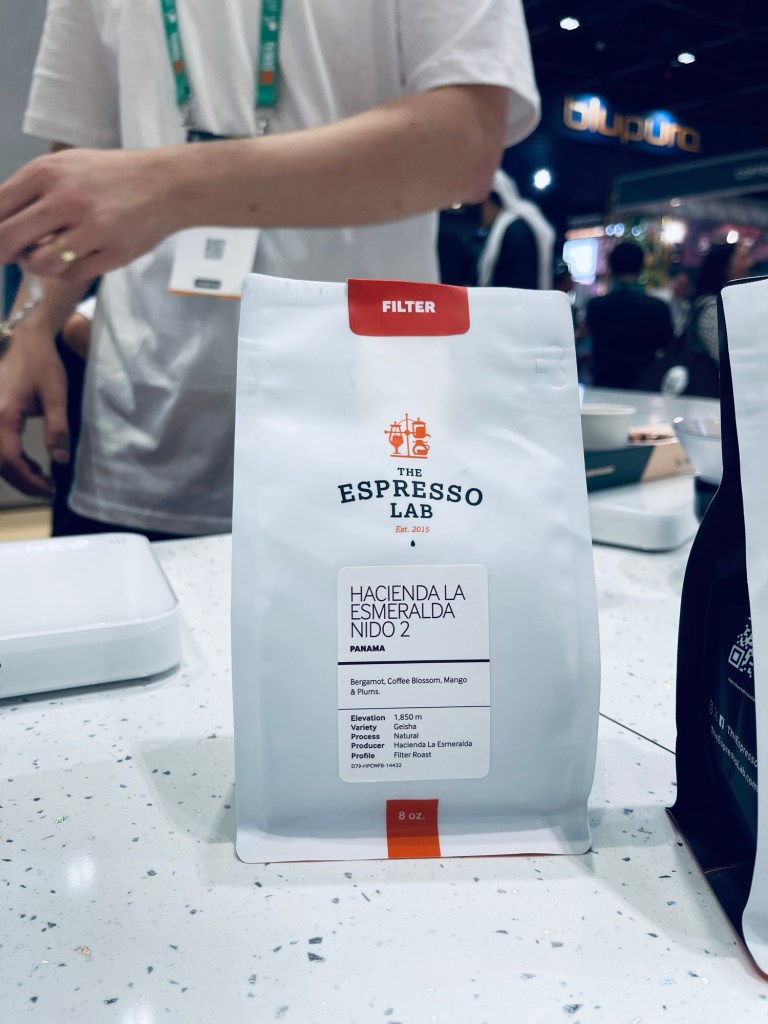
Geisha Coffee from Hacienda La Esmeralda Coffee Farm
Hacienda La Esmeralda
The first time I tasted coffee from this world-famous coffee farm in Panama, which was award the most expensive coffee back in 2011, I had my café in Cape Town. The memory of that cup still lingers with me – jasmin earl grey blue flowers – sounds crazy but what an impression. So, I was happy to see the farmers brewing coffee at the Espresso Lab Stand and got to taste not 1, but 3 cups of coffee between naturals and washed…. YUM!
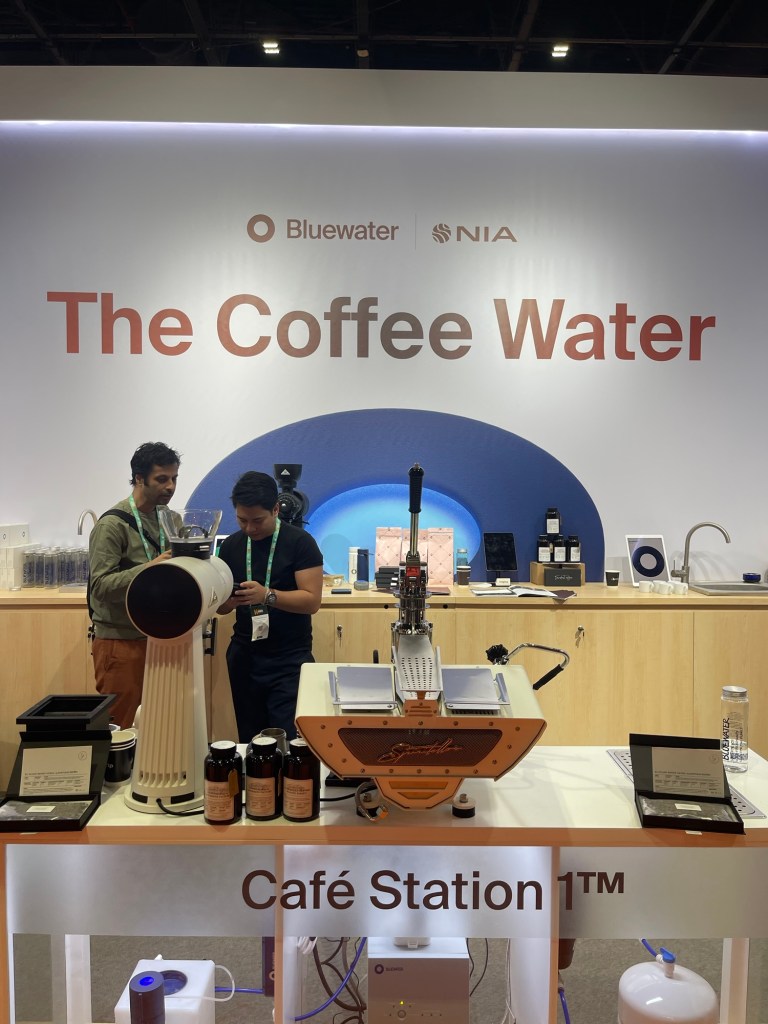
Bluewater
Blue water coffee station
Wandering around near the competition stage, I bumped into Alexander from the company, who is based in Dubai and can be seen at Roast Trip in al Quoz. In summary as over 90% of coffee is water, getting the water right is paramount, so I was happy to chat and learn more about their new technology, which removes impurities, adding Swedish minerals, allowing you to alter TDS amongst other things when brewing your coffee. For example, you can alter the minerals for espresso or filter. As you know, with more water being used for filter, the water quality is very key. They also offer their device for the home too (tempting once I get a bigger pay cheque). Incidentally they won best new product of the year.
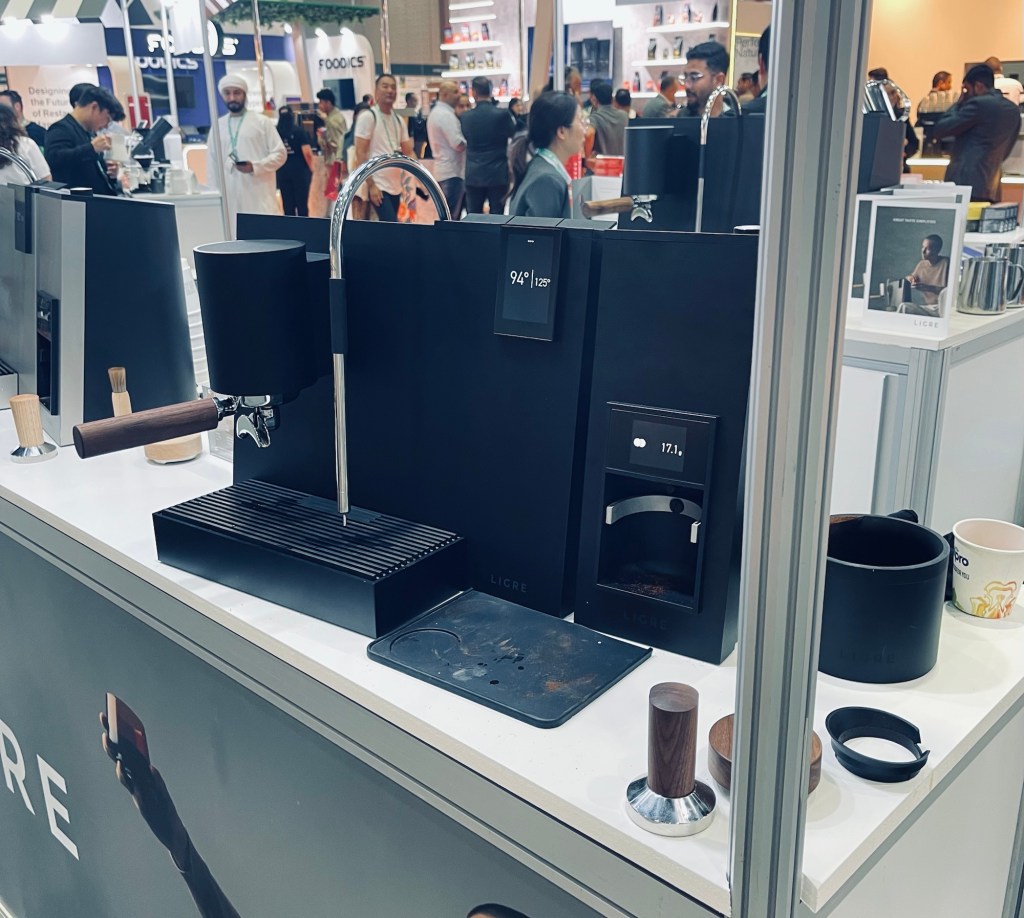
Ligre Espresso Machine
Ligre espresso machine
The owner, Lina Gronbach, reached out to me prior to WOC to ask me to visit their stand and check out their Ligre Youn espresso machine with a difference. She introduced me to their slick design, made with satin-finished anodized aluminium and which one could easily be mistaken as an automatic coffee machine, but the sleek wooden handle portafilter gives it away. Brewing can be done with just a few lever buttons at the top with options for both manual and automatic on offer and an “uber” style milk technology that froths perfectly micro foam too. A very aesthetically pleasing espresso machine costing just under EUR5,000 with its patented technology, and grinder to pair. Lina showed me how to use the machine and prepared an Italian style espresso. Growing in popularity in Germany amongst serious coffee snobs, it has already won gold at the German Design Award and the iF Design Award – no surprise there.
Coffees galore
I was happy to meet Khaled the Siphonist, whom I follow on Instagram and who was on hand to brew coffee using …. You guessed it a Siphon.
Khaled the Siphonist
I also stopped over one of my fave coffee roasteries, Cypher, where I had their Palestina Coffee as my first milk based coffee.
Cypher La Palestina flat white
I invited a friend of mine who is thinking of opening a coffee-based business to enjoy the atmosphere, which he did.
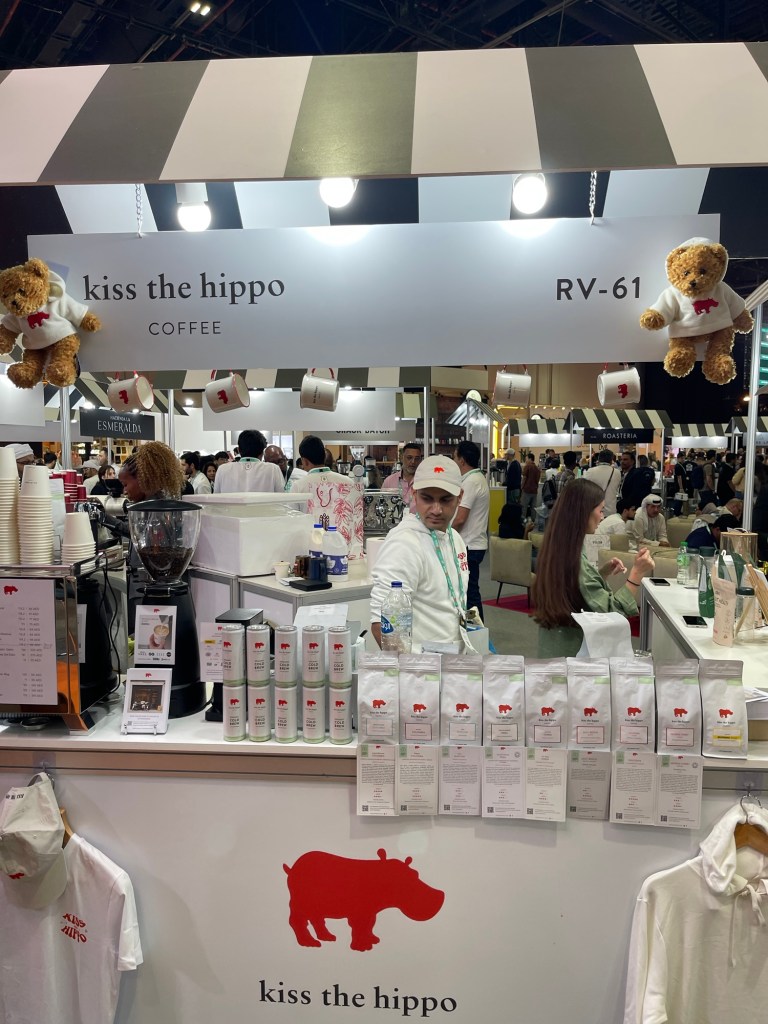
We wandered across many stalls including Kiss the Hippo, Grandmother, Subko and many more.
Kiss the Hippo from London
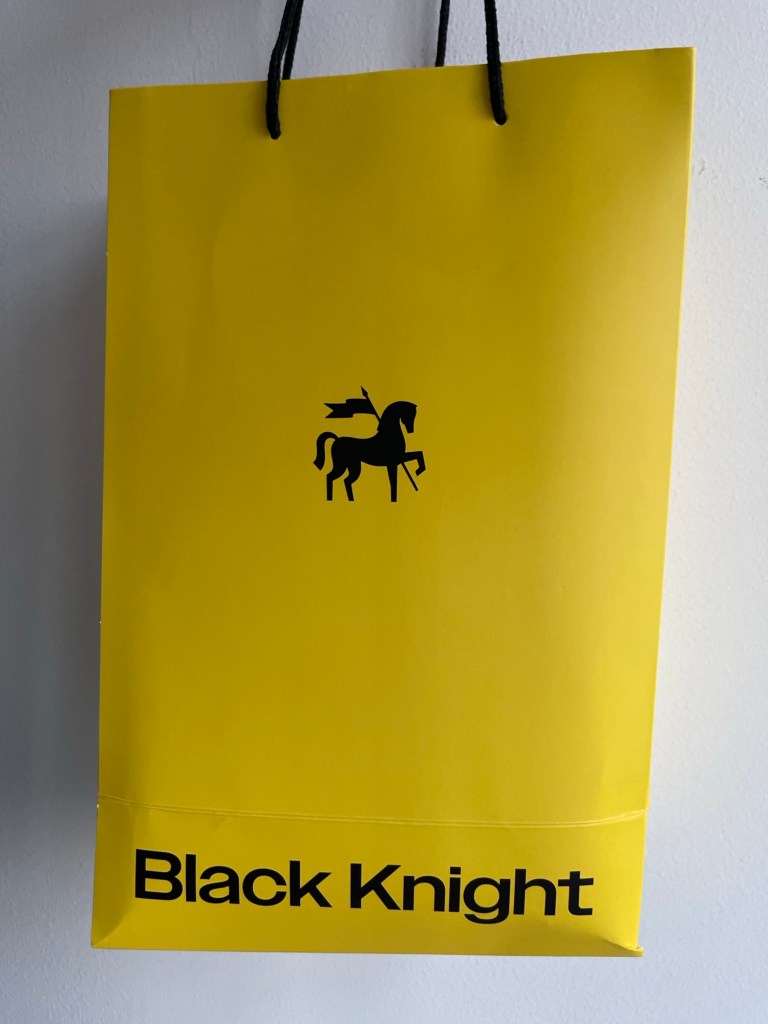
By far the largest stand was a coffee brand from Saudi Arabia, The Black Knight, where I met the CEO, who gave me not one, BUT 4 bags of coffee to take away. Very generous and customer focused no doubt.
Black Knight Coffee Saudi
So, that’s my round up of WOC2025 and I am already looking forward to the 2026 version, where I hope to attend more than one day insha’allah.
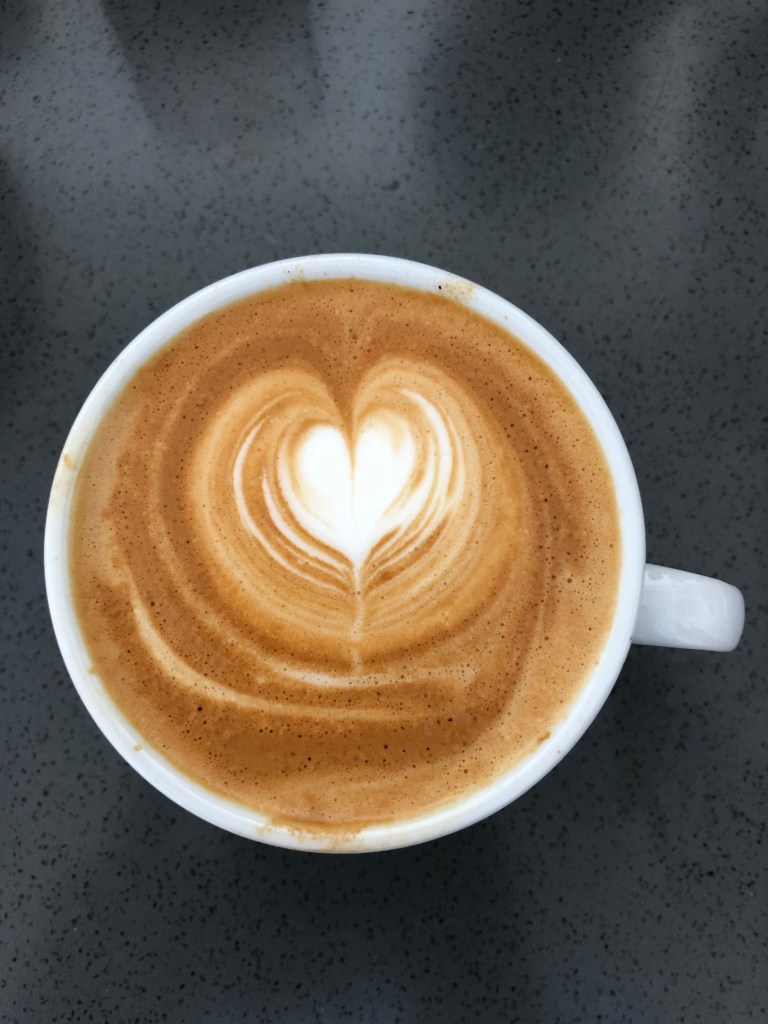
If you’ve been following me on Instagram, you’ll probably know that I start my day of with a daily cappuccino, which means that I need to start with a great espresso, which means that a great espresso machine is a must – after all, this is from coffee with love and with anything in life, if you don’t invest time and money (sometimes), you won’t get anything serious and long lasting back in return, so back to coffee.
Daily cappuccino
The journey to a great espresso machine
When I was on the lookout for an espresso machine a few years back, after my Isomac went bust, I did a lot of research and decided that within my budget, I would buy a Rocket R58, which was available at one espresso shop in Vienna, where I lived back in 2014.
So, I made my way to the shop, funnily called Taste It, fully determined to walk away with a new espresso machine, having not had espresso coffee for about 2 weeks. I walked in and proudly announced my intentions, which I thought would bring a smile to the retailer – we are after all talking about a machine that would cost around EUR2,000 (AED8,000). I expressed that I wanted a machine that I wouldn’t have to replace for several years and that I felt that the Rocket R58 fitted my desires in this sense.
After walking over to the machine and showing me what I had only previously seen on websites, the retailer turned to me and said it was sold out and wouldn’t be available for about 1-2 months. I asked why and he mentioned China’s thirst for espresso had meant that the manufacturer, who made about 200 every month, sent about 1-2 to Vienna and the remaining to China. Before I burst out into tears like a child at a candy store being told you can look at the sweets but you can’t have any, the owner of the shop walked over to me and offered me a deal on a machine he believed was better than the Rocket R58.
Initially sceptical for 2 reasons – why is he trying to sell me a more expensive machine and why is he selling me a German machine (most are made in Italy). After carefully explaining some of the aesthetics of this new machine, I was tempted. To sweeten the offer he offered me a new espresso grinder, the Macap M4D – an electric grinder on demand machine and told me I could have the machine in 2-3 days, mentioning that I could return it in one month if I didn’t like it. BAM, I was sold or should I say, “sold to the lover of espresso”. He offered me some sort of brewing lesson but after my friend who accompanied me told him I used to own a coffee shop using a La Marzocco Linea 3 group, a few years back, he said I didn’t need it. Well ! I would hope so, after all I had already been writing about coffee for well over 10 years.
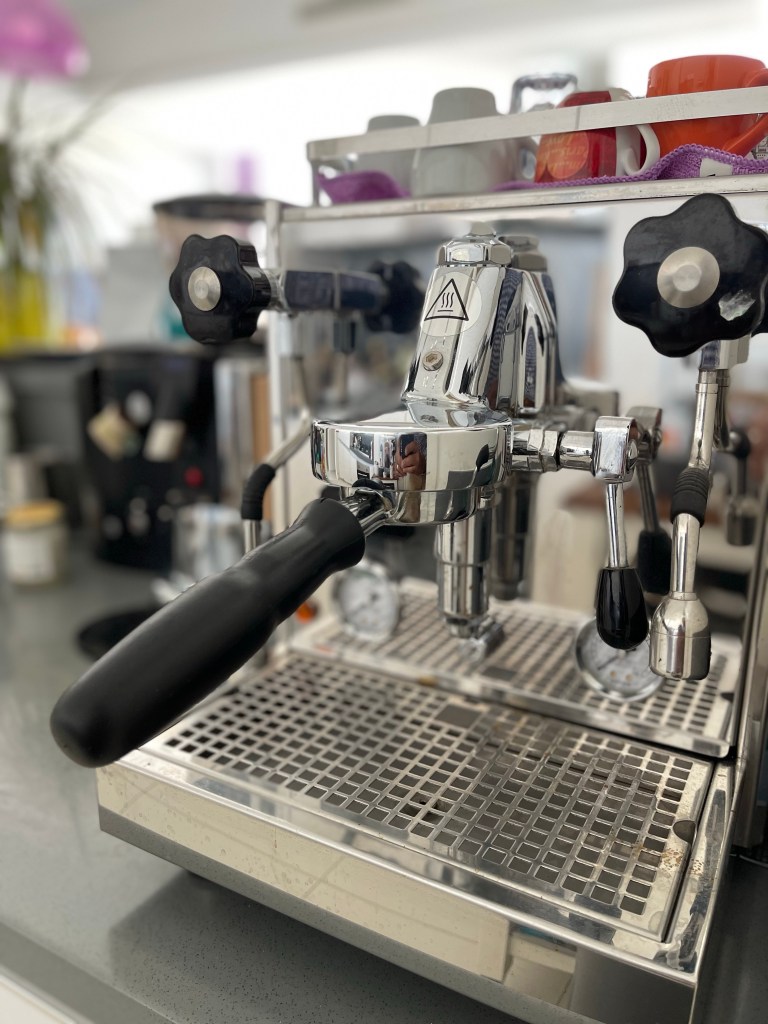
Espresso machine
So, what espresso machine did I buy and have owned for almost 8 years now? (time flies when you’re brewing great espresso on a great machine) Here’s a snapshot from the manufacturer’s website –
Dual boiler
PID-display for the individual temperature adjustment of both boilers
PID-display indicates the brewing time in seconds
E61 brew-group
Rotary pump (it means that when you brew espresso, the noise isn’t loud)
Wear-free rotary valves
High-end steam and hot water wands
Boiler and pump pressure gauges
Stainless steel boiler with 0.75 liter volume for espresso preparation
Steam and hot water boiler in stainless steel with a 2.0 litre volume
Steam boiler with separate on/off switch
Boiler insulation
In short, I wanted a dual boiler rotary pump machine with PID. A dual boiler means that I have a separate boiler for espresso and one for steaming milk.
Steam wand
Technically a PID means Proportional-Integral-Derivative but this really means you can control the temperature of the boiler. So, if you want to brew your espresso at 92-93C, ie. fruitier, more acidity, you can and if you want to brew it at 95C, more chocolatey/nuts, you can, of course depending on other variables like roast profile, water texture, acidity in the water, brew pressures, etc, but it helps.
On rotary pump; generally it is a lot quieter and from what I was told, would last longer than a vibration pump – in fact that’s what happened with my old machine, the vibration pump was kaput (German for spoilt).
Also, the machine had brass and copper parts inside, which help to preserve heat and the outside is made with stainless steel, which last longer than normal steel.
So, I bought a Profitec Pro 700, which is a German made prosumer machine – suitable for consumers with a professional bias, I guess. It’s their top of the range machine with all the pro cons but they now offer other variations, Pro 600, Pro 500 and very recently a Pro 400 and it’s baby, Pro 300.
Pro 700
What was the price you may still be asking… well let’s say that I didn’t tell my wife for a few years, But let’s say I saved about EUR400.
After the purchase
I must confess, the first few days back then were a bit painstaking and a word of advice – you will encounter this with any new machine. I was used to ordering coffee from some of the best coffee roasters in the World but the coffee I was given to start from the shop, albeit good to look at, was not up there on the taste notes. I found that the specialty coffee I was used to, was not pulling as good and at one point longed for my old machine, which I was so used to. I thought simple is sometimes just best.
However, before you gasp in horror and bring out the tissues, you’d be happy to know that as I got more used to the machine and the grinder settings, as well as the ability to adjust the brew pressure to between 9 and 11, the espresso began to improve.
First time
One thing straight up that was much better was definitely the ease of steaming milk – it was bliss compared to my old machine – no regrets there. I caught myself in the typical dilemma of good micro foam for latte art poured on top of sub-standard espresso – I was close to depresso on most shots during the first few months. But things changed, if not I wouldn’t be writing this and I no longer regret my purchase, yay! After all it’s been 8 years with this machine baby.
Brewing espresso
After I bought the machine, I did some more research and Profitec have expanded, offering their products in the US especially, where if you visit youtube, you can learn how to use the machine and study what it’s made off. Their new model is also on offer in the UAE too. I have pimped my machine though, using La Marzocco portafilter holders.
Espresso love
So, if you are in the market for a new espresso machine that you want to last for 10+ years and don’t want to pay $5,000, check this brand out and no, I don’t get any kind of sponsorship from them.
THREE CAUTIONS
COST
Espresso is the most expensive way of making coffee and even world experts like James Hoffmann have said that they don’t even own one – that’s fine if you own a world-renowned coffee roasting company, Square Mile Coffee, so I guess he can go to work and pull as many shots as he likes. You must love espresso because if you are going to spend this type of money, then please use the machine at least once a day. Better if you have more people in your house that love espresso-based drinks, then it would be cheaper than drinking coffee outside your home.
TIME & WASTE
It follows too, that making espresso is also expensive in terms of wasting coffee to get the right grind when you buy different coffees, not to mention the change in temperature and more. But also time. Sometimes it can take a few minutes to make an espresso. For me, it’s a part of my daily ritual in the morning, so I don’t rush it.
MAINTENANCE
Anything more expensive, means that the maintenance will also be expensive too. So, you need to buy the right gadgets to clean it regularly, use filtered water or a filter to minimise the worst damage, limescale. Read more about cleaning an espresso machine here For me, in the last few years since I bought the machine, it’s been serviced twice, had a few parts changed and a bit more, BUT it’s still worth it.
BUT
If you love espresso coffee and are willing to give it time, then it’s one of the best ways to express your love ❤️ for coffee.
Ever wanted to know a little bit about where the word Mocca comes from? Watch my video as I use the @fellowproducts ekg kettle brewing a delicious full bodied rare coffee from….. YEMEN.
This week’s coffee hails from Honduras – Los Ceibos – Microlot, a coffee of the red bourbon variety, grown at 1,380 m, naturally processed with a taste profile of strawberry, rhubarb and caramel, roasted for Balthasar, in Vienna. So, I’m using the aeropress, with 15.5g of freshly ground coffee and about 210ml of 95C hot water. I’m using the inverted method and filming from a sky view so that you can see the process from the top.
On the taste, I picked up the caramel and as it cooled down, a bit of berry taste. check out the video below for more details. https://www.instagram.com/p/CDCTEGXBiHf/
WELCOME TO MY NEW HOW TO USE SERIES, WHERE I SHOW YOU QUICKLY HOW TO USE MY FAVOURITE COFFEE TOOLS.
The Aeropress – Very popular with many coffee connoisseurs BUT how do you actually use it and what is it?
In short, it’s a filter brew process, popular amongst Specialty coffee enthusiasts and was invented by Alan Adler, A Stanford University Professor in 2005. Initially it was ignored as a coffee tool when it came out, as it claimed to make espresso BUT after working with some coffee experts, it rebranded and dropped the word “espresso” and is now very popular, so much so, that they now have…. wait for it…. World Aeropress Championships annually.
I use it every other day and depending on the coffee, sometimes more because it works best with certain coffees, usually low-medium acidity for me. It’s easy to travel with and I always take with me when I travel. There are many ways of making coffee with an aeropress, which costs about US$30, but here I’m using the inverted method. I usually use;
I’m the type of person that needs change and ever so often I’m looking for new ways to experience things with food and drink. Sometimes I think that my taste buds are so used to good coffee that I wonder what I’m tasting and if all coffee doesn’t taste the same. Well! that misconception is usually short lived until I go to a “typical” coffee shop or spot and they offer me coffee and I think “how can they get this so wrong”. I’m still intrigued by the on-going debate about how world class restaurants serve you fantastic food but when you ask for that espresso at the end of a great meal, you think “why did you get this wrong?”.
Ok, I digress. I was looking through the flipboard (apple app for news update), which naturally I subscribe to coffee news and came upon this recipe on thecoffeecompass by Michael Butterworth, who is a coffee educator, who cofounded the Coffee Compass and is a two-time USBC Competitor, licensed Q Grader, and was once the 4th best Aeropresser in America (source: the coffee compass). Since finding the recipe I’ve tried it thrice – once verbatim, second, when I didn’t break the crust but took it out to give a cleaner cup and today with a slight adjustment on temperature and steep time.
In summary, it is;
15g freshly ground coffee
225ml of 95C hot water
Using two filter papers
Pour almost boiling water into the aeropress and place plunger on – this will create a vacuum
Steep for one minute
Take plunger off and break crust but giving it a quick stir
cover again and steep/leave for about 4 minutes, then plunge.
For my slight variation today; I used 15g of coffee but about 240ml of 91C hot water. Followed the same plunge and break the crust, but for the final steep, I left for about 2 minutes.
What did I notice taste wise using Kenya AA Plus Gicherori, SL28-SL34 Ruiru 11 ? For Michael’s version, definitely more fruity. I was excited by this new recipe and fruitiness and medium acidity tickling my tongue.
For my second variation (removal of crust for a cleaner cup) – medium acidity with a light citrus taste. For my third variation (lower temperature and reduced brew time) – whilst not as fruity as version one, but more balanced.
What did I learn also ? Using 95C hot water and pouring in straight away creates a vacuum – I actually thought that coffee would start dripping straight away but it didn’t. I was also fascinated by the breaking of the crust concept. I tried this coffee on the Hario V60, but it wasn’t as fruity as on the aeropress.
I’m quite excited by this new version and I’ll probably use it until I am intrigued by another simple to use recipe. Please share any aeropress recipes with me and perhaps I’ll feature them too.
I know, back in the UAE again – I can’t help it, if Emirates offer the most competitive routes to the countries I travel in Africa, at least currently, and let’s face it, A 48 hour stopover in Dubai is too tempting to pass off. Okay, so sifting through Instagram, my eyes were caught by the introduction of the UAEs first or at least one of the first Synesso espresso machine at a shop in Sharjah – the next emirate to Dubai. So, when I visited just last week and I was tole we had to attend a wedding feast in Sharjah, I quickly opened up Instagram to try and find out which cafe it was, so that I won’t miss the opportunity to check out another specialty cafe. By chance, I actually found them through another committed coffee geek centre, Speciality Batch, (Espresso Lab, Hundred Wellness Centre, Dubai) whom I’ve never visited, but who seem to have the exclusive rights to Synesso in the UAE.
After stuffing my self with all kinds of food, I encouraged my friend, another keen coffee guy, to search and try out Ratios coffee. After driving around for close to 30 minutes – committed – we found the shop, which is like a goldmine in terms of speciality coffee in this region.
Overlooking the Sharjah Creek by an area called the Corniche, connecting both Souq Al Arsah and Souq Saqr, Ratio prides itself on keeping things simple. It works with speciality micro-coffee roasters from the region, which in this case is Speciality Batch, located in Dubai.
Khalid Faisal Al Qassemi, Vice Chairman of Al Qasimi Group and Owner of Ratios, said: “We opened Ratios to offer our guests perfectly brewed coffee unlike what is served in branded shops amidst a vibrant atmosphere and supported with exceptional customer service (source: Khaleej Times)
and I can’t complain about that…. although it was busy, you could tel that when busy, there’s a really relaxed vibe here, the kind you find in your typical neighbourhood cafe in New York or London.
Upon entering, it’s quite obvious that coffee is the champ here – okay they’ve got some sandwiches, pastries and sweets on display but the coffee stuff outweighs the others; there’s an uber boiler, a chemex, bags of specialty batch coffee everywhere, other coffee tools and of course the Synesso in customised colours.
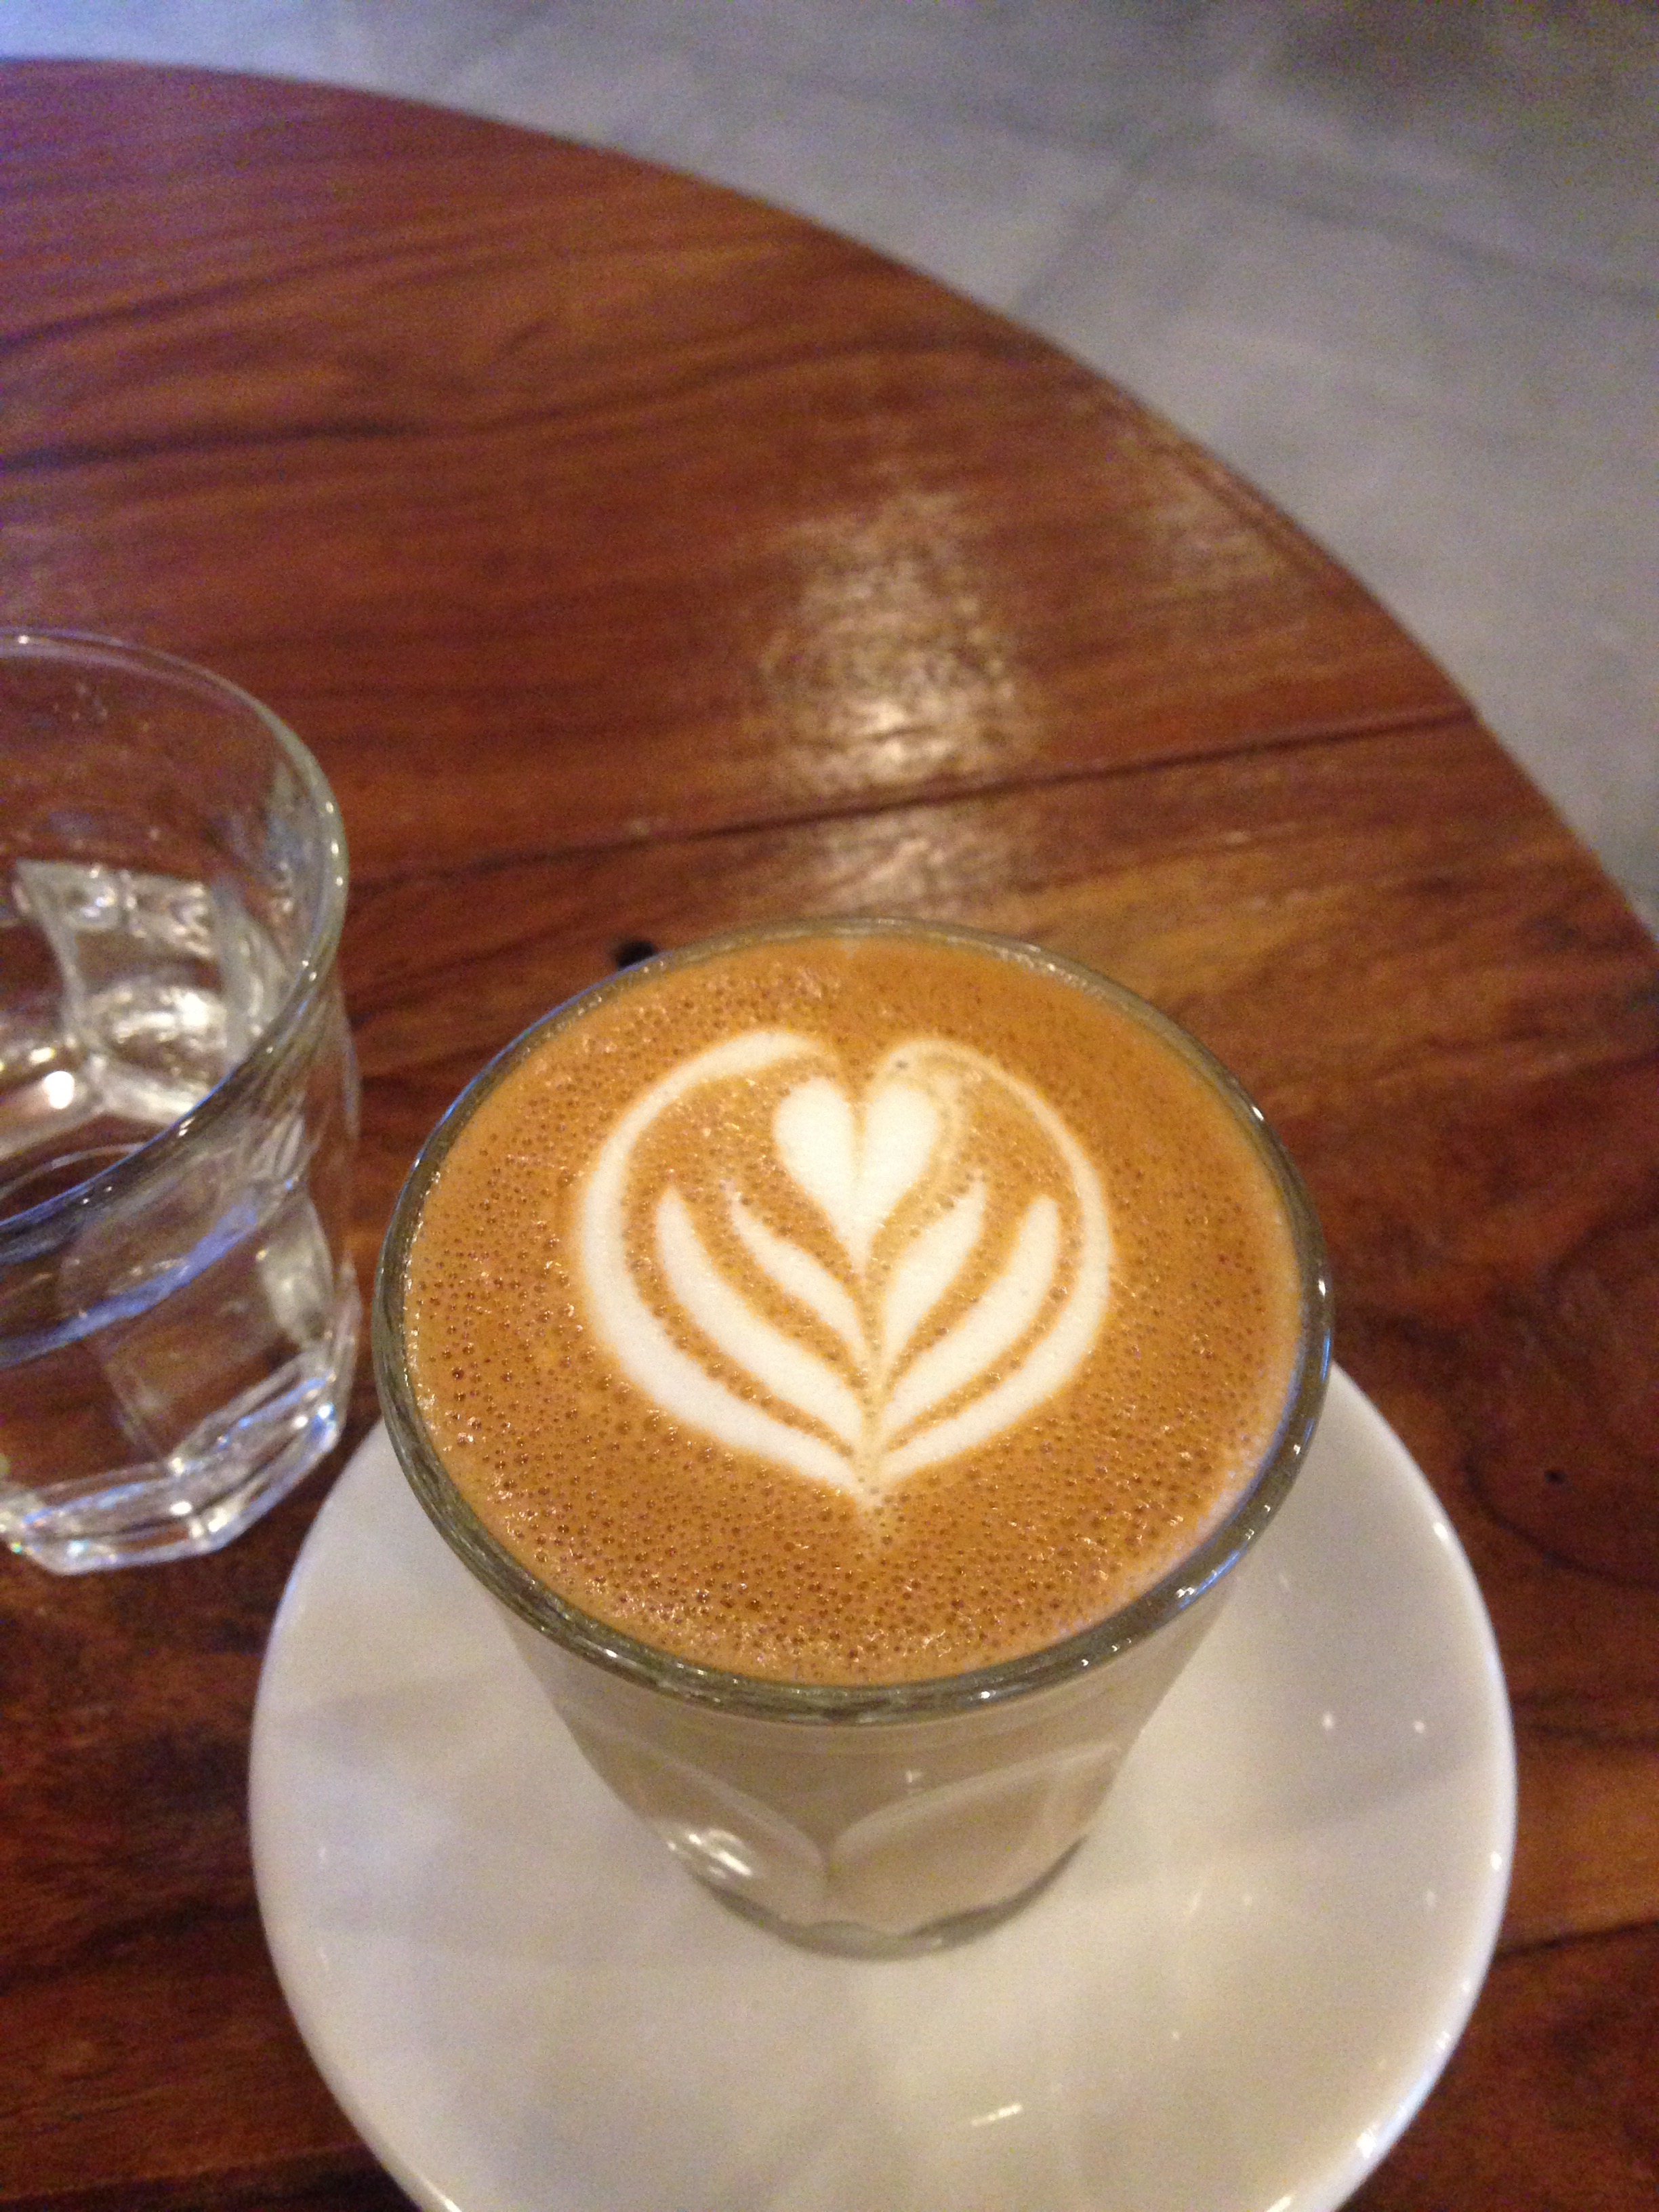
I decided to place an order for a piccolo – a mini-latte but stronger in terms of coffee – double shot coffee with a lot less milk, because the drink is made in a 120ml cup.
I couldn’t however resist the cheesecake topped chocolate brownie – forgive me, but there wasn’t any dessert at the wedding, so I was craving something sweet and wow! Nothing like a great dessert to accompany a great coffee.
I took pics and sent them to my daughter to taunt her – it worked – “daddy can you please bring me a slice” Erm! not sure how that will work on a 5 hour flight.
The barista, Ronald, is really into his latte art, very easy to talk to and give advice.
On the latter, before leaving for Dubai, Ronald asked us to check out Cremolata, located in the University City of Sharjah, apparently awarded the best gelato in the Middle East but more importantly for me, they serve coffee from another new and top micro-roaster, gold box – another place to check sometime soon insha’allah. On this occasion we had an espresso – medium acidity and smooth, with hints of caramel.
So, if you’re tired of Dubai and wants o explore another Emirate not too far away, I highly recommend Ratios Coffee. If you can’t ask make it before Ramadhan, i.e. before 6 June, then check them out after and cool off with some gelato at Cremolata too, who also have a branch in Dubai.For more, see ratioscoffee
Thanks to Jon Penn, co-founder of Hackney Coffee Company, located on 499 Hackney Road, London for reaching out to me through Instagram and sending me a bag of delicious Nicaragua Nuevo Segouia Catuai, natural dried arabica coffee.
About the coffee, the taste profile is advertised as rum, raisin and cascara tea. I can’t say for sure that I picked up those exact profiles, except for the cascara tea, when I tested it cold, leaving the coffee fro about 20 minutes. What I picked up was dried berries, like cherry, a fruity burst, medium acidity, well balanced and on calling dark chocolate.
My colleague, an expert wine taster actually described it as a
Friendly coffee
By that, he meant, well balanced, pleasant to drink, raspberries, medium acidity and well balanced.
A pleasant cup.
On brewing method, I tried it out using an aeropress, but I must confess I loved it better using a Hario V60. This is where I was able to pick up a high tasting notes. In fact I liked this coffee so much, that I visited their website to try and order it, but form what I gather, they don’t have an online shop yet.
so, if ya down in East London, go grab a cuppa at Hackney Coffee Company, mate – sorry couldn’t help myself in putting a typical cockney accent.
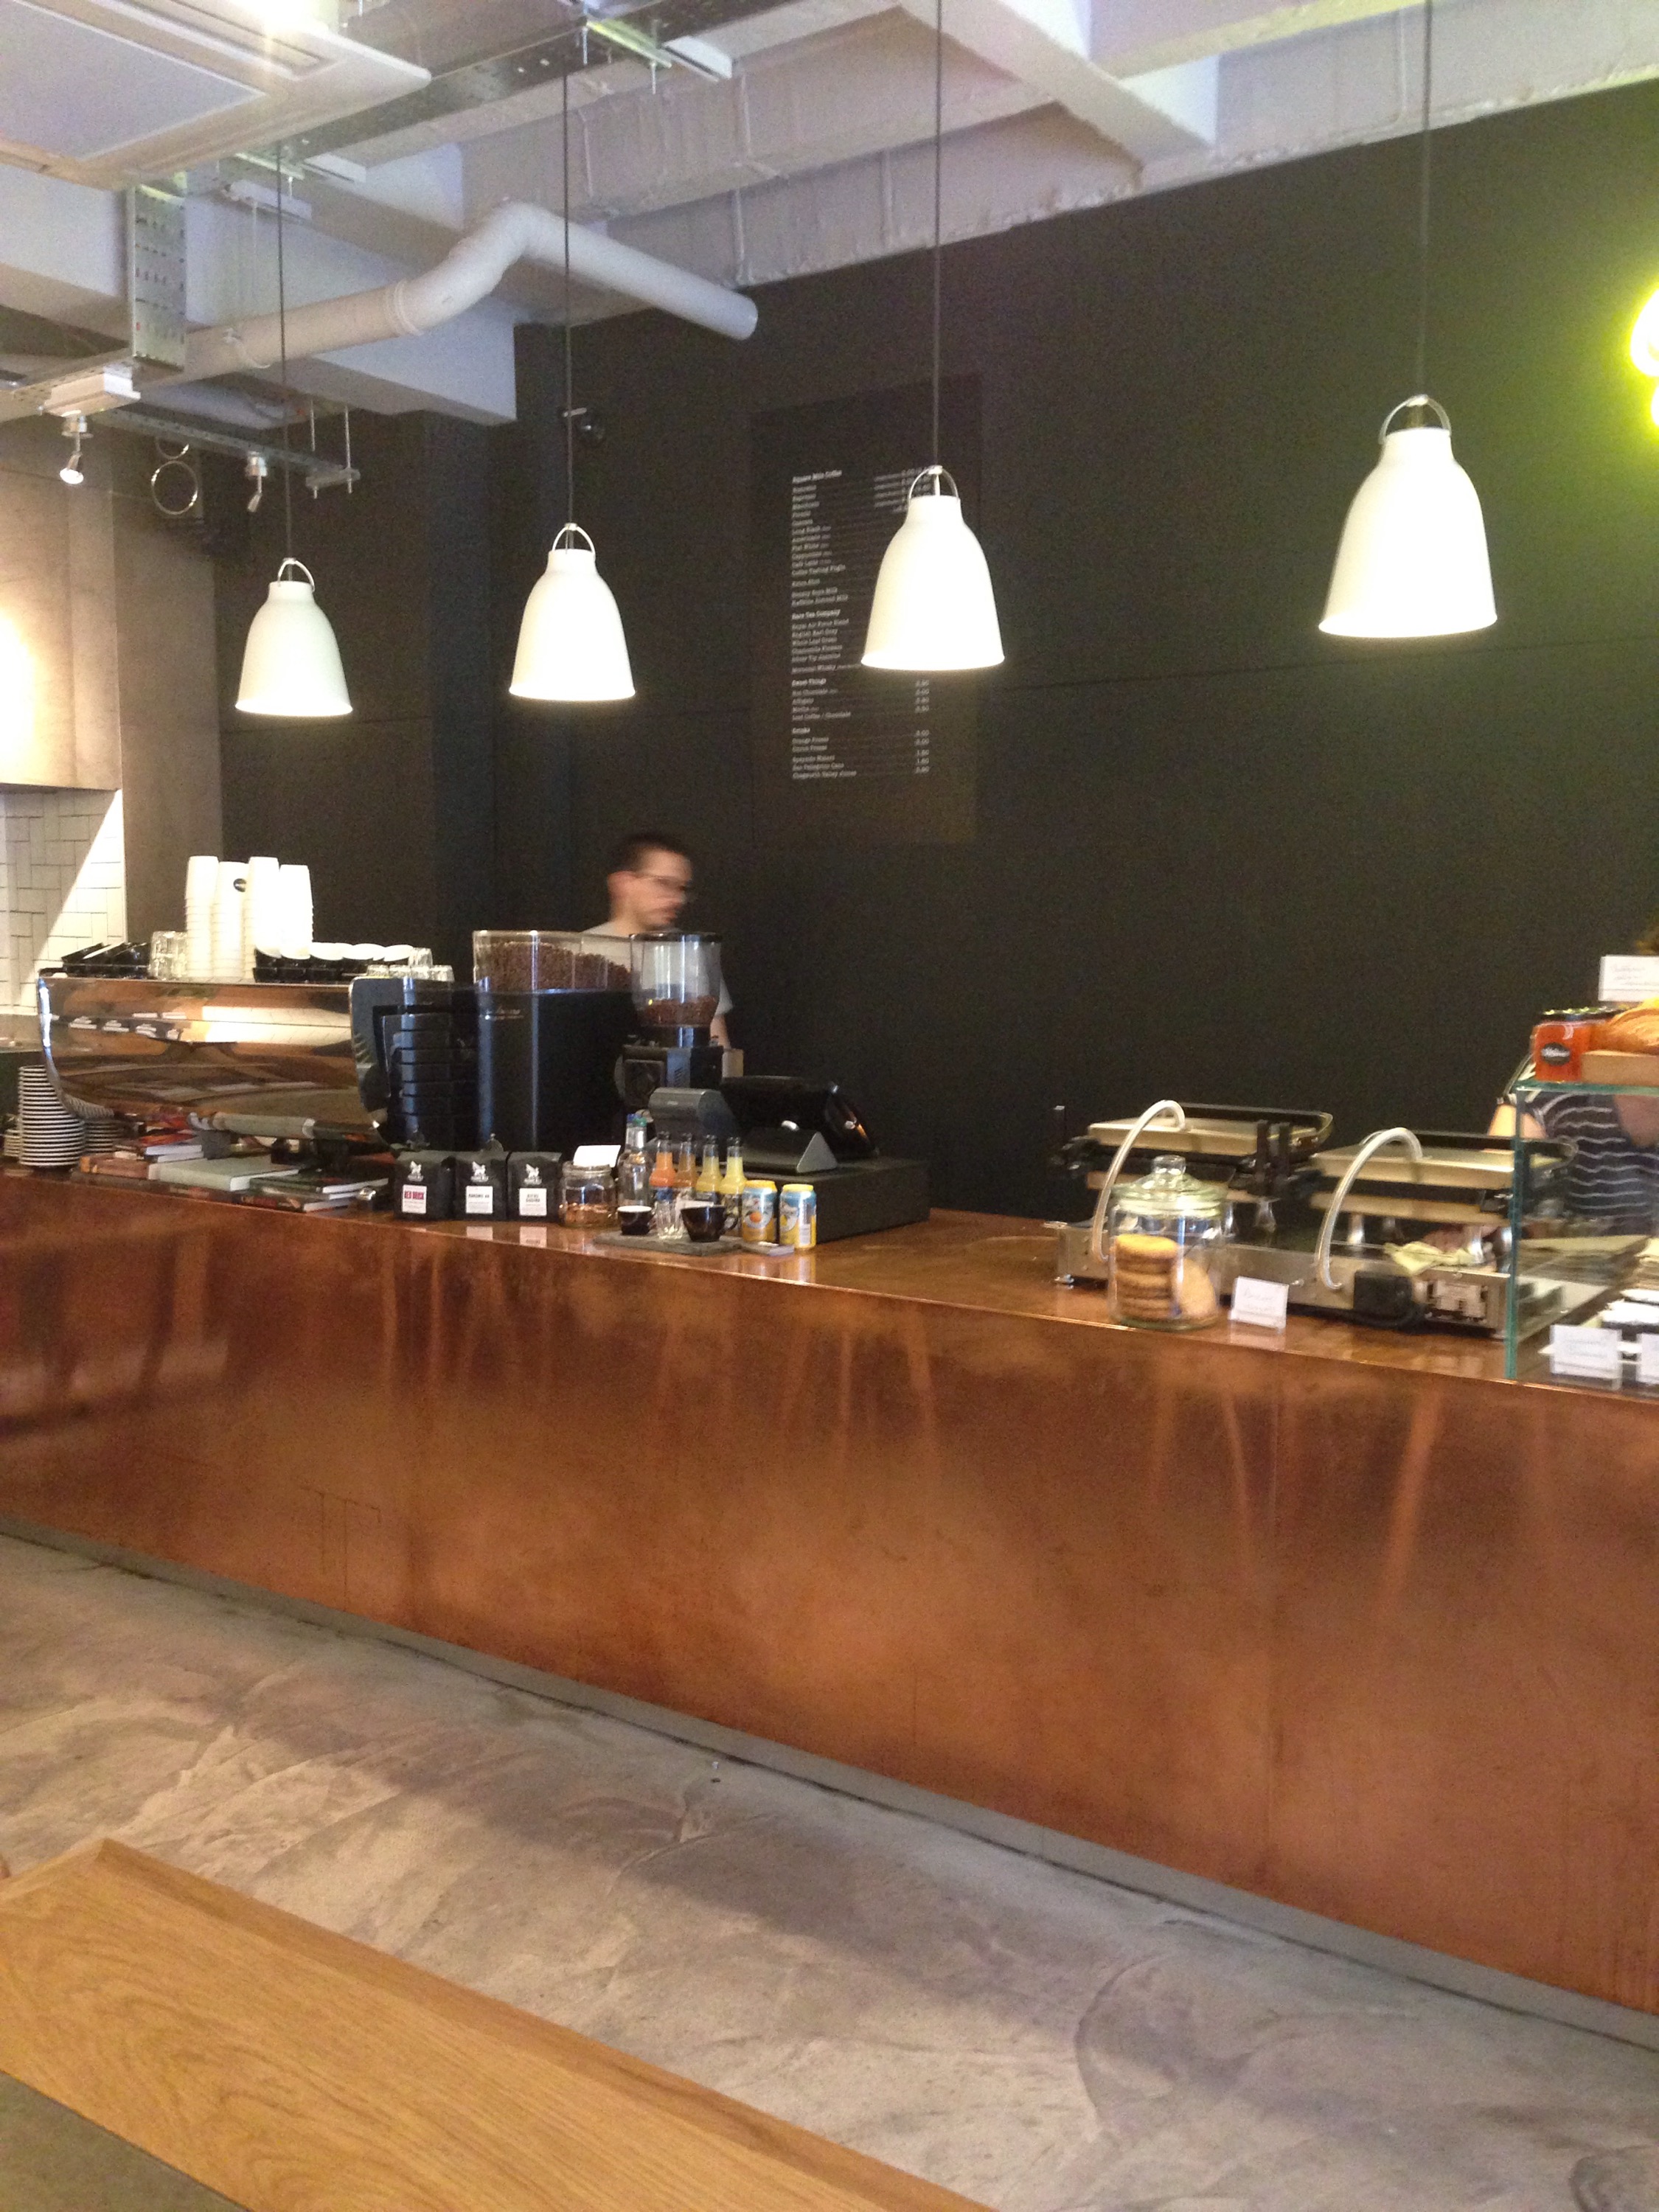
Lucky me, it seems like I just travel the World visiting cafes and sampling good coffees, BUT, it’s really not like that, trust me. It’s just that whenever I get the opportunity to try something out involving the bean and new cafes, then I try and make the effort. So, I’ve got 7 hours in London on a beautiful war spring day in London and if you know my coffee fix programme, that means at least 2 cafes have to be visited in between my other passion, men’s fashion and food. So, my final stop this time, was literally like “saving the best for last”. Just opened in 2015, is the London renowned Kaffeine, who won best cafe in Europe a few years back – see my first post on them here. In any case, after all these years, they’ve now opened another shop, a lot closer to the shopping nirvana of Oxford Street, near the Tottenham Court Road End/Soho on 15 Eastcastle Street to be precise.
The first thing you notice is that it’s bigger than the first one – famous for great coffee, light bites and delicate sweet offerings, the first shop was always jam packed and you literally wanted to get in, drink up and get out, unless it was a Saturday morning – so here we have space, space for books, gadgets and coffee on sale, notably Square Mile Coffee Roasters, whom Kaffeine have been very loyal since their inception). The offerings are the same – deliciously named sandwiches, light bites and sweet treats – I was tempted by the latter… and of course great coffee, prepared with care, but wait for it, there’s more…
I unusually ordered a piccolo (similar to an espresso macchiato but with more milk and latte art). Sat down and went through the recent coffee books by James Hoffman and Anette Moldvaer of Square Mile Coffee Roasters.
Took some pics, ate my sweet treat and drank my coffee, but wait, what’s that in the corner – what kind of espresso machine is that ?
Ever curious, I walked over to the barista and he was so keen that someone came up to him to ask about the machine that he gave me a very quick run down and I must say, I don’t think his colleagues appreciated it (hope he doesn’t get into trouble). In any case I recognised the machine from the Vienna screen showing of “a film about coffee”, the Nuova Simoneli Black Eagle VA388. After some brief reading, the machine was designed in collaboration with James Hoffmann and as stated on the Nuova Simoneli website, it’s the first espresso machine to have;
both “T3” and “Gravimetric” technologies. The first ensures thermal stability, the second always provides the right amount of coffee in the cup. The combination of these two technologies means the barista can ensure a consistently excellent espresso, personalized by enhancing the features and aromas of each type of coffee
The gravimetric one really got me – the ability of the machine to weigh the coffee and extract the right brew weight all in one – Wow! that is really taking it to the future and it comes as no surprise that this espresso machine is the most expensive in the World, as the barista proudly told me.
So, in summary, Kaffeine have upped the game – they’ve got a new site, nearer to more people, bigger than the first, with an expanded menu and the best espresso machine in the World, so why go, I think you have the answer, GO get your self some great coffee and more.
The Chemex coffee maker was invented in 1941 and the iconic design remains unchanged today. Made of borosilicate laboratory grade glass, it is a sturdy heatproof vessel. Some coffee makers have plastic or metal parts that react with coffee oils and acids, but this is not the case with glass. For more than 70 years, generations have in turn embraced and ignored this simple coffee-brewing contraption. My Grandma had one, my Mom did not–and now I have one. The Chemex is in vogue again as pour over coffee gains popularity worldwide.
Deceptively Simple
To brew coffee with a Chemex, all you need is the Chemex itself, a Chemex filter, ground coffee and 200F (93C) water. But is it really that simple? This depends on your coffee personality: Are you a Coffee Professor or a Coffee Artist?
The Coffee Professor (more like Lameen)
At heart the coffee professor desires repeatable results like with any scientific experiment. To this end, the professor begins by washing the Chemex with a coffee machine cleaning powder solution and rinses and dries it thoroughly to remove any previous coffee residue. Next, fresh filtered water is placed in a variable temperature gooseneck electric kettle set to 200F (93C). It only takes a few minutes to get to the right temperature and then the kettle shuts off on its own. With the equipment prepped and ready, the professor is ready to brew.
The professor takes a Chemex brand paper filter and inserts it with the triple layer resting against the pour spout channel. The gooseneck kettle is used to wet the paper filter as it rests in place. The filter is then removed, the hot water is discarded and the filter is reverently put back into its place. This serves to pre-heat the glass carafe as well as rinse the paper filter to get rid of any “bland” smells.
Although the Chemex is an affordable brewer (for coffee geeks), the professor will use a burr grinder that costs a lot more than the Chemex. This coffee grinder is calibrated to produce particles that are considered in the ‘fine drip’ coffee range. A kitchen scale is used to measure out 36g of good quality coffee beans, which are then freshly ground prior to the brewing process (remember, coffee begins to loose its optimal taste after a few seconds of grinding). The freshly ground coffee is then placed in the filter. The Chemex, filter and coffee are then placed on the scale and the tare on the scale is set to zero.
With the precise control of the gooseneck kettle, just enough water is dribbled over the ground coffee to moisten it. This allows the coffee to “bloom,” a chemical process where carbon dioxide is released. The fresher the coffee, the more it blooms. After a specific amount of time (30 seconds to 1 minute depending on coffee ideology) the professor moves from pre-infusion to a methodical wetting of the grounds. In a concentric motion, water pours evenly into the Chemex until it is near the top. This cycle is repeated until the scale records 25-30 US fluid ounces (730-800 grammes) of water. From coffee bloom to completion should take no more than 5 minutes. If the coffee drained faster, the grind was too coarse and if the coffee drained too slowly, the grind was too fine. In this manner the professor fine-tunes the Chemex brewing method.
The Coffee Artist (Samantha – the writer)
The coffee artist knows inherently what it takes to make a good cup of coffee through trial and error or through muscle memory over time. My mom called this type of estimation, “eyeballing it.” I fall squarely into this camp. I do not have the perfect coffee brewing equipment; I make do with what I have in the kitchen.
My kettle is heavy and hard to pour – It was a wedding gift. I boil the water and then pour it into a glass measuring cup that has an okay pour spout. I pre-wet the filter (barely) and then swirl and unceremoniously dump the hot water from the carafe. That is my nod to the pre-warm, pre-rinse, residue removal phase. I have a standard coffee scoop and I use 5 or 6 of those. My coffee is delicious and locally roasted with the roast date printed on the bag and since I do not yet own a burr grinder I buy it pre-ground.
The coffee smells so delicious in the Chemex that I cannot wait for it to bloom. I pause for maybe 10 seconds to admire the pretty brownie cake-like surface and then continue to pour until it fills the Chemex to the top. As it drains out, I add more hot water until the level of coffee in the carafe reaches the bottom of the wooden collar. Then I compost the filter and spent grounds. While I enjoy the brew process, my desire is to fill a mug with delicious freshly brewed coffee as soon as possible. If I took a few shortcuts along the way, is mine better/worse/different than the coffee professor’s exacting methods?
Vive La Difference!
I think there is room for many coffee brewing styles in this world. When I go to a pour over bar I appreciate that they brew with accuracy and the goal is to attain an enjoyable and repeatable cup of coffee. Now that you know about the Chemex method of coffee brewing, you are welcome in either camp, just don’t forget to bring fresh coffee.
This article, with very slight editing by moi (Lameen) was produced by Samatha Joyce, a writer for seattle coffee gear – http://www.seattlecoffeegear.com/